-
![]()
Sofia Albert
Sofia has been involved with tech ever since she joined the EaseUS editor team in March 2011 and now she is a senior website editor. She is good at solving various issues, such as video downloading and recording.…Read full bio -
![]()
Melissa Lee
Melissa Lee is a sophisticated editor for EaseUS in tech blog writing. She is proficient in writing articles related to screen recording, voice changing, and PDF file editing. She also wrote blogs about data recovery, disk partitioning, data backup, etc.…Read full bio -
Jean has been working as a professional website editor for quite a long time. Her articles focus on topics of computer backup, data security tips, data recovery, and disk partitioning. Also, she writes many guides and tutorials on PC hardware & software troubleshooting. She keeps two lovely parrots and likes making vlogs of pets. With experience in video recording and video editing, she starts writing blogs on multimedia topics now.…Read full bio
-
![]()
Gorilla
Gorilla joined EaseUS in 2022. As a smartphone lover, she stays on top of Android unlocking skills and iOS troubleshooting tips. In addition, she also devotes herself to data recovery and transfer issues.…Read full bio -
![]()
Rel
Rel has always maintained a strong curiosity about the computer field and is committed to the research of the most efficient and practical computer problem solutions.…Read full bio -
![]()
Dawn Tang
Dawn Tang is a seasoned professional with a year-long record of crafting informative Backup & Recovery articles. Currently, she's channeling her expertise into the world of video editing software, embodying adaptability and a passion for mastering new digital domains.…Read full bio -
![]()
Sasha
Sasha is a girl who enjoys researching various electronic products and is dedicated to helping readers solve a wide range of technology-related issues. On EaseUS, she excels at providing readers with concise solutions in audio and video editing.…Read full bio
Content
Dawn Tang
Updated On 03/10/2025
0 Views |
0 min read
Quick Tips
✅Import your clip into Premiere Pro and adjust the audio volume by expanding the audio track and dragging the volume line up or down. Export the clip through "File" > "Export" > "Media…".
When we edit interviews or dialogues in Adobe Premiere Pro, we may find that the speaking voice is slurred or the background sound covers it. Balancing volume levels in videos helps clarify speech, emphasize important points, and maintain consistency during transitions between scenes or different clips.
Premiere Pro offers built-in methods to adjust the volume seamlessly within your editing workflow. Whether you're fine-tuning dialogue clarity, blending background music, or adding dramatic sound effects, these tools allow for precise control over audio levels.
Control Volume on the Timeline
💪Work for: Single track
🪜Difficulty: Easiest
The first MP3 volume booster feature is the easiest way for adjusting volume level, directly changing the volume on the timeline for quick changes to the clip’s audio level. It offers visual control over audio levels and is ideal for quick adjustments. However, it can be less precise for complex audio editing requiring dynamic volume changes.
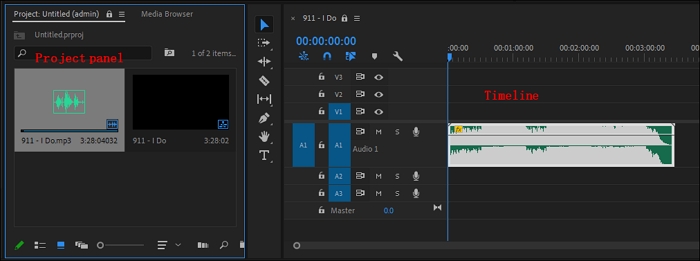
Step 1. Import your audio or video clip and place it on the timeline.
Open Premiere Pro on your computer, go to "File" > "New" to start a new project, or "Open Project…" for old projects. Then name your new project and follow the path: "File" > "Import…" to add your local file. Bring it onto the timeline.

Step 2. Adjust the audio volume level.
Hover your mouse between two tracks until you can see a little tool, click and hold the left mouse and drag it down to expand the audio track. Then, you can see the volume level line.
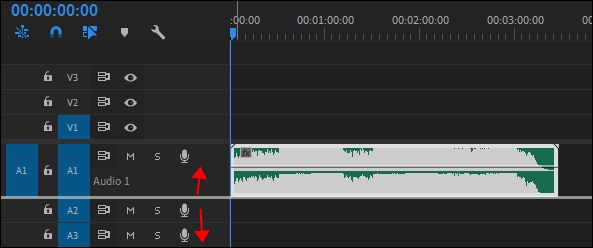
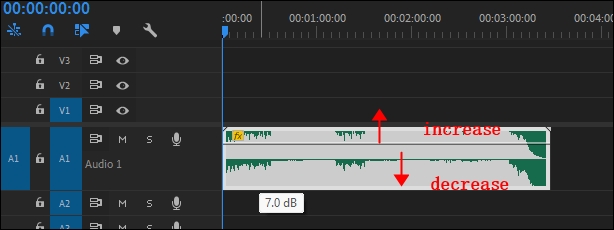
Hold and drag the volume line up (increase) or down (decrease) to adjust the volume.
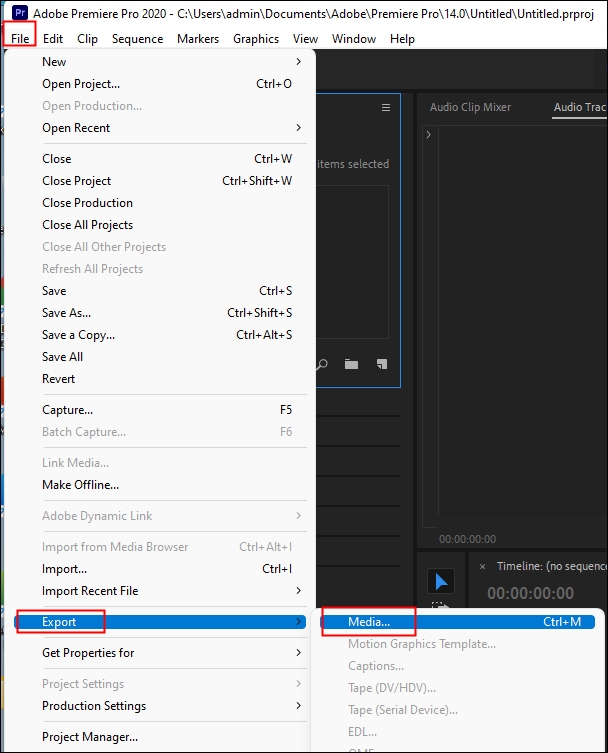
Step 3. Export your clip.
Go to "File" > "Export" > "Media…" and specify the output level settings to export.
Turn up/down Volume Using Audio Gain
💪Work for: One or more clips
🪜Difficulty: Easy
Gain refers to the input level or volume of audio clips. You can adjust the gain level using the Audio Gain command for selected clips. This command operates independently of the output level settings found in the Audio Track Mixer and Timeline panels. The gain value combines with the track level for the final mix.
Adjusting the audio gain is straightforward and effective for overall volume adjustments, ensuring consistent audio levels across your project. However, it lacks the flexibility for making precise volume changes at different points within the clip, and using it with initially low levels can amplify unwanted noise.
Step 1. Select your clip.
- Make all audio the same value: select the source clip in the Project panel.
- Adjust one instance of a clip: select the clip in the Timeline panel.
- Select specific clips: Shift-click your desired clips. Shift-click for contiguous clips in the project panel, and use Ctrl-click (Windows) or Command-click (Mac OS) for non-contiguous clips.
Step 2. Do one of the following to open the Audio Gain dialog box.
- Right-click on the clip and choose "Audio Gain."
- Go to "Clip" > "Audio Options" > "Audio Gain."
- Use keyboard shortcut G.

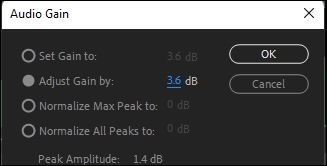
Step 3. Adjust the gain level.
- Set Gain to: set the gain to a specific value. The value updates reflect the current gain even when it is not selected.
- Adjust Gain by: adjust the gain by a positive or negative dB value to increase or decrease volume.
- Normalize Max Peak to: set the maximum peak amplitude to a value below 0.0 dB, adjusting the selected clips to match the specified peak level.
- Normalize All Peaks to: set all peak amplitudes in the selected clips to a value below 0.0 dB, normalizing the peaks to the specified level.
Increase/Decrease Volume Using Keyframes
💪Work for: One or more clips
🪜Difficulty: Middle
Keyframing provides granular control over the audio, enabling smooth fades and complex volume changes within a clip. However, it requires more time and effort compared to simpler volume adjustments.
On the Timeline Panel
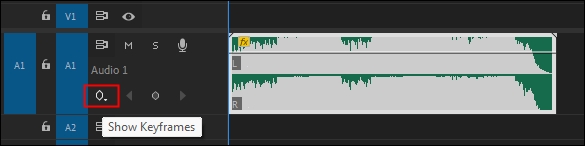
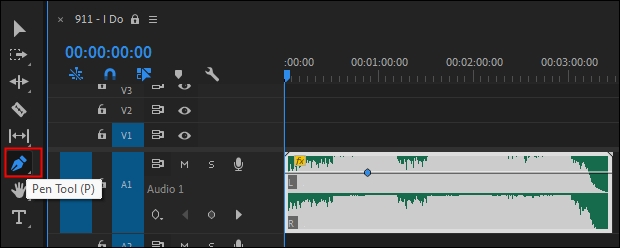
Step 1. Import and expand the audio track on the timeline.
Step 2. Click the "Show Keyframes" button.
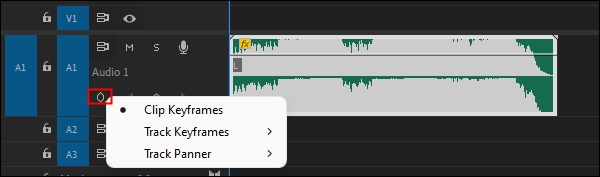
Step 3. Choose one option from the following:
- Clip Keyframes: Animate audio effects, such as volume, for a specific clip. These keyframes apply only to the selected clip.
- Track Keyframes: Animate audio effects, like volume and mute, for an entire track. These keyframes apply to the whole track.
- Track Panner: Adjust a track's volume level.
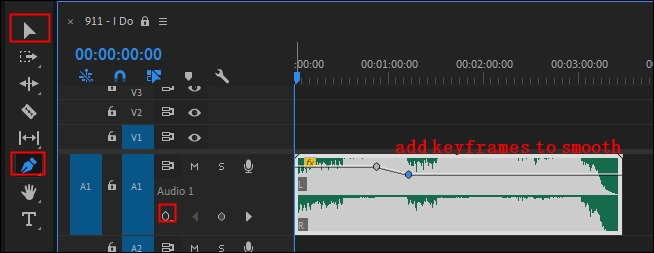
Step 4. Either use the Pen tool or press Ctrl-click (Windows) or Command-click (Mac OS) to create keyframes.
Step 5. Adjust the volume.
Use the Selection or Pen tool to move up or down to adjust the volume. You can place your time indicator and click the keyframe button to add an anchor, then drag it down or up to gradually increase or fade out audio.
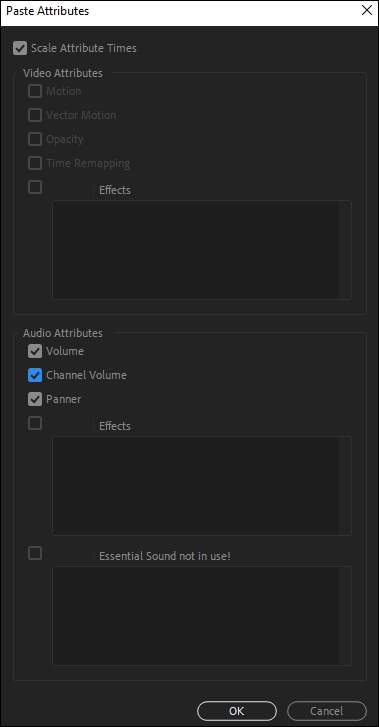
Step 6. Apply a volume level to multiple clips.
Select the edited clip and choose "Copy." Select one or more (shift-select) clips and right-click to choose "Paste Attributes." Choose the audio attributes or effects you want to copy and click "OK."
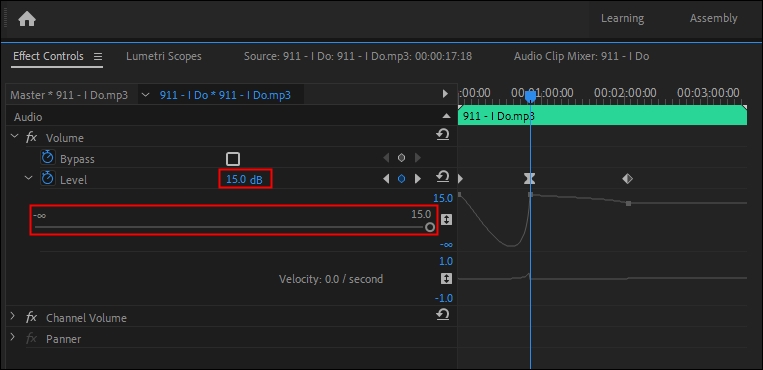
On the Effect Controls
Step 1. Choose your audio clip and expand the "Effects" panel.
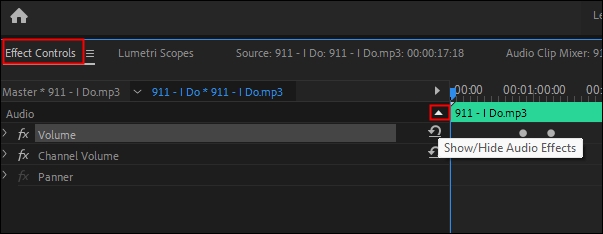
Step 2. Change the volume.
Enter the volume level value next to the "Level" or click the forward button to "Go to Next Keyframe." You can expand the downward arrow next to the Level and toggle the slider to change it. Drag the keyframes on the right to define the volume effect.
Adjust Volume Using the Audio Clip Mixer
💪Work for: One or more clips
🪜Difficulty: Difficult
The Audio Clip Mixer adjusts the volume, channel volume, and clip pan in the Timeline panel. However, it requires a good understanding of the software, and beginners might find it complex compared to simpler audio editing tools.
Step 1. Locate the "Audio Clip Mixer" panel in the top left of your screen. If it's not visible, go to Window > Audio Clip Mixer to open it.
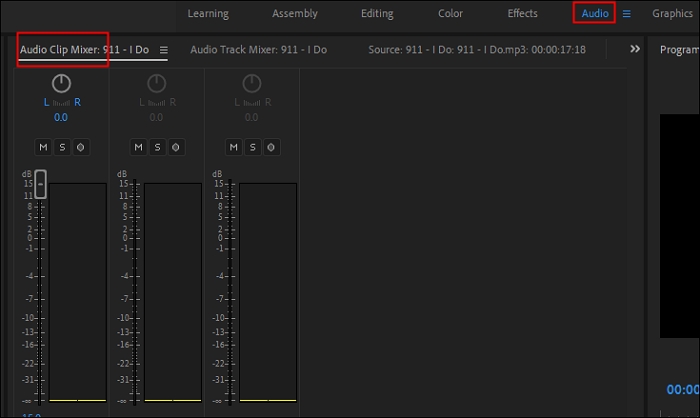
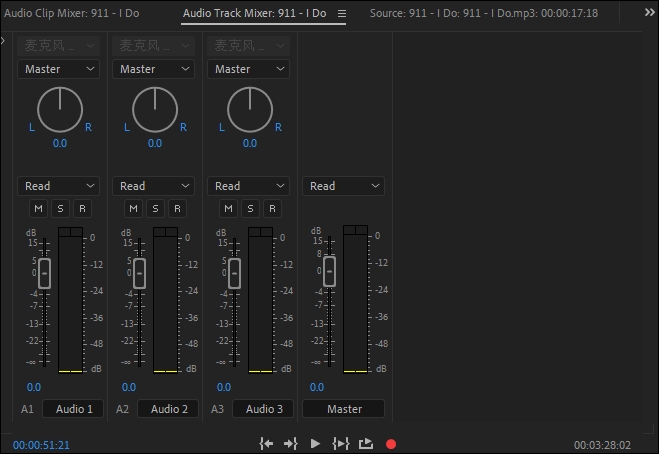
Step 2. Find your track slider.
In the Audio Clip Mixer panel, you'll find sliders for each audio track in your sequence. Identify the track of your audio clip and locate the corresponding slider.
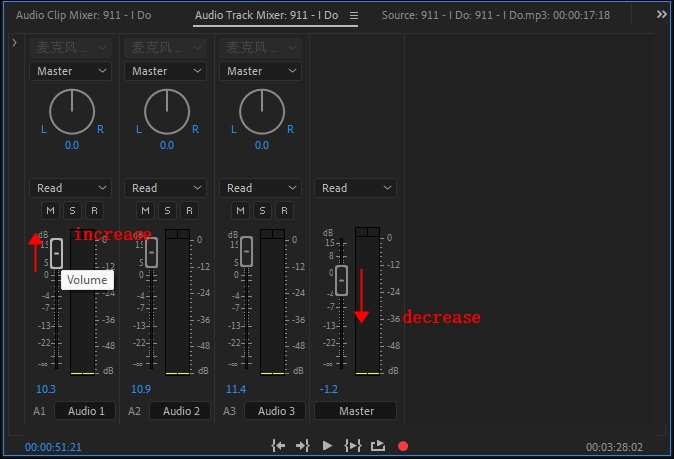
Step 3. Turn up or down the volume.
Click and drag the slider up to increase the volume or down to decrease it. The volume level is shown in decibels (dB) as you move the slider.
If you found this guide on adjusting volume in Premiere Pro helpful, please share it on social media to help others improve their audio editing skills!
Change Audio/Video Volume Online Easily Without Software
For beginners, adjusting the volume in Premiere Pro can be challenging and daunting. Online free volume boosters are better alternatives with a user-friendly interface and easier steps without login.
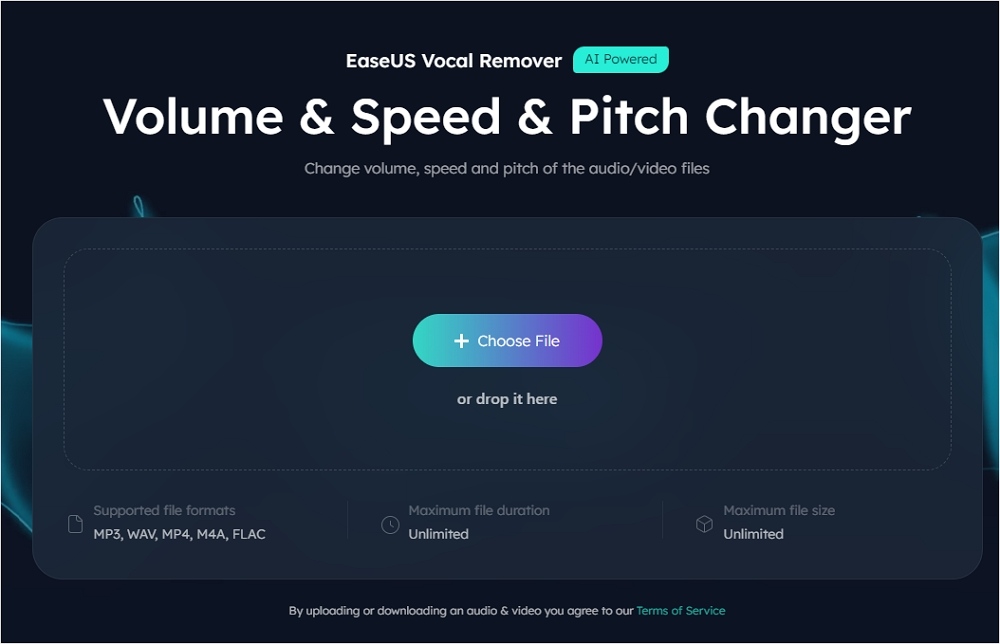
EaseUS Online Volume Changer allows users to change the volume from 0.01x to 3x without limiting file duration or size. It supports multiple file formats, such as MP3, WAV, MP4, M4A, and FLAC. One can change the speed, pitch, and volume at the same time.
Except for that, it is also a MP3 voice remover to remove vocals from songs and extract instrumentals, including piano, drums, guitar, and bass. You can also use it to remove wind noise from video or find the key of a song.
Key Features
- Change the volume, speed, and pitch online.
- Support audio and video formats.
- Remove vocals from a song.
- Unlimited file duration and size.
Powered by Advanced AI
Step 1. Go to the website and find the "Pitch Changer."
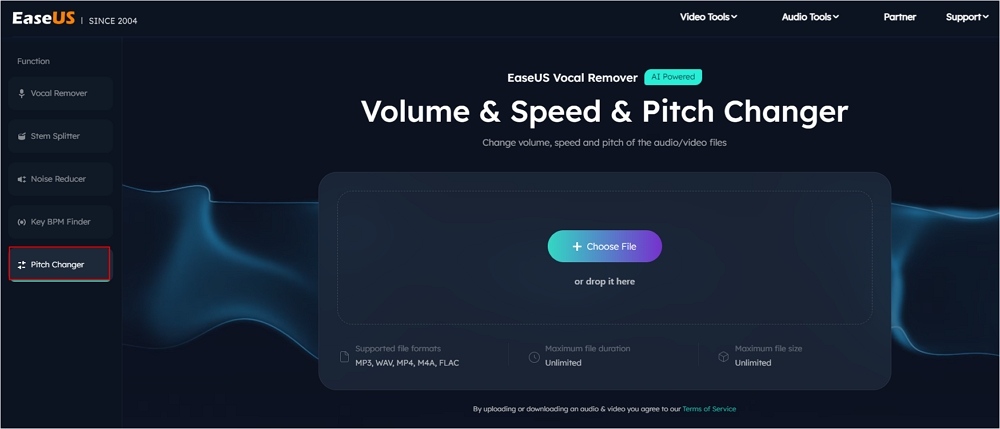
Step 2. Browse the local library or drag and drop your file without limit to the area.
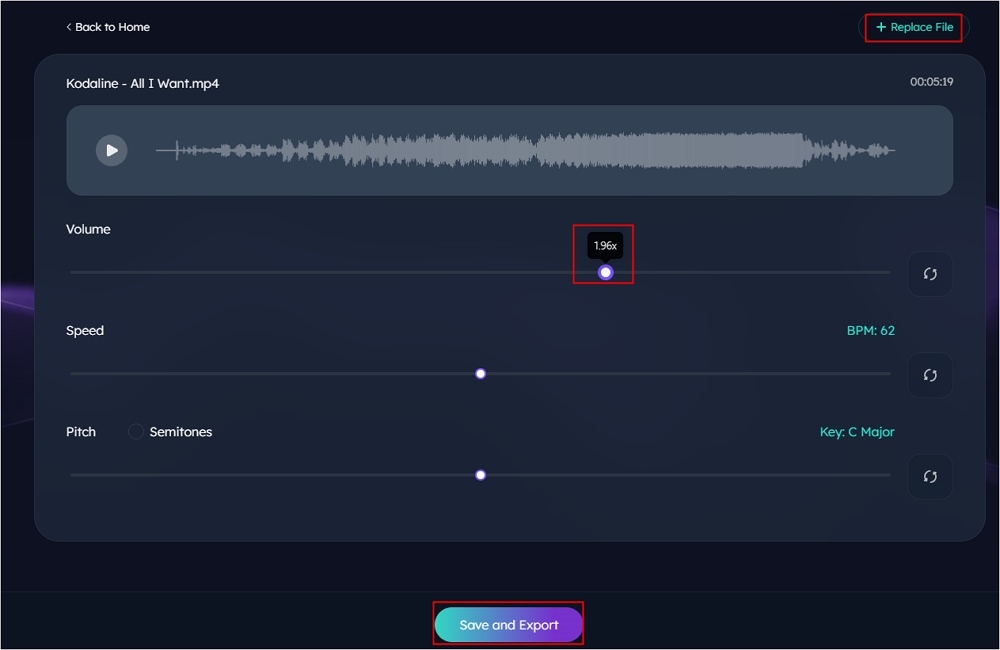
Step 3. Toggle the volume slider to the left or right to adjust the volume from 0-3x. Select "Replace File" for a change. After the adjustment, press "Save and Export" to download the file with volume altered.
Wrapping up
Adjusting volume in Premiere Pro can be done in several ways, each providing flexibility and precision to suit different needs. Whether you use the Audio Clip Mixer, the Essential Sound panel, keyframe adjustments, or gain settings, Premiere Pro offers powerful tools to ensure your audio levels are just right.
For those seeking a quick and straightforward online solution, the EaseUS Online Volume Changer is a great alternative for simple volume adjustments without needing to open editing software.
Powered by Advanced AI
How to Increase/Lower Volume in Premiere Pro FAQs
1. How to split audio in Premiere Pro?
- Drag the clip you want to split into the Timeline.
- Choose the Razor tool from the toolbar.
- Click on the clip where you want to make a cut. If you want to split only the audio or video portion of linked clips, hold down Alt (Windows) or Option (macOS) while clicking with the Razor tool.
2. How to add text in Premiere Pro?
- Launch Adobe Premiere Pro and open your project. Ensure your timeline is ready for editing.
- Find the Text Tool in the toolbar, represented by a "T" icon. Click it to activate text editing.
- Click and drag on the program monitor to create a text box, defining the area for your text. Adjust the size if needed.
- Type your desired text directly into the text box.
- With the text selected, go to the Essential Graphics panel. Modify font styles, sizes, colors, and other properties to match your project's theme.
- Drag the text clip to the desired position on the timeline. Use markers to specify when the text should appear and for how long.
- Once satisfied with your text, save your project and export the video.
3. How to add transitions in Premiere Pro?
- Open the project and import your clips.
- Right-click the clip and select "New Sequence From Clip." Drag all the clips you want.
- Go to "Effects" > "Audio Transitions" / "Video Transitions."
- Expand the options and select one.
- Drag the desired transition and drop it at the beginning or the end of your clip.
4. How do I normalize volume in Premiere Pro?
To normalize audio in Premiere Pro:
- Select the audio clip in the timeline.
- Go to "Audio" > "Audio Gain."
- Change the "Normalize Max Peak."
- Click "OK" to apply.
5. How do I adjust volume in Premiere Elements?
- To resize an audio track for better visibility, position the pointer between two tracks in the track header area until the Height Adjustment icon appears, then drag up or down.
- Select "Volume" in the upper left corner of the clip, then choose "Volume" > "Clip Volume."
- Position the pointer over the yellow Volume graph line on the audio track. When the pointer changes to a white double-arrow icon, drag it up or down to adjust the volume uniformly. You can also drag existing keyframes to move them.
- As you drag, the decibel level is displayed: a positive number indicates an increase in volume, while a negative number indicates a decrease.