-
![]()
Sofia Albert
Sofia has been involved with tech ever since she joined the EaseUS editor team in March 2011 and now she is a senior website editor. She is good at solving various issues, such as video downloading and recording.…Read full bio -
![]()
Melissa Lee
Melissa Lee is a sophisticated editor for EaseUS in tech blog writing. She is proficient in writing articles related to screen recording, voice changing, and PDF file editing. She also wrote blogs about data recovery, disk partitioning, data backup, etc.…Read full bio -
Jean has been working as a professional website editor for quite a long time. Her articles focus on topics of computer backup, data security tips, data recovery, and disk partitioning. Also, she writes many guides and tutorials on PC hardware & software troubleshooting. She keeps two lovely parrots and likes making vlogs of pets. With experience in video recording and video editing, she starts writing blogs on multimedia topics now.…Read full bio
-
![]()
Gorilla
Gorilla joined EaseUS in 2022. As a smartphone lover, she stays on top of Android unlocking skills and iOS troubleshooting tips. In addition, she also devotes herself to data recovery and transfer issues.…Read full bio -
![]()
Rel
Rel has always maintained a strong curiosity about the computer field and is committed to the research of the most efficient and practical computer problem solutions.…Read full bio -
![]()
Dawn Tang
Dawn Tang is a seasoned professional with a year-long record of crafting informative Backup & Recovery articles. Currently, she's channeling her expertise into the world of video editing software, embodying adaptability and a passion for mastering new digital domains.…Read full bio -
![]()
Sasha
Sasha is a girl who enjoys researching various electronic products and is dedicated to helping readers solve a wide range of technology-related issues. On EaseUS, she excels at providing readers with concise solutions in audio and video editing.…Read full bio
Content
Quick Tips to Increase Volume in Audacity
1. Amplify the Sound in Audacity
2. Normalize the Audio to Make it Louder in Audacity
3. Use the Envelope Tool to Increase the Volume
4. Apply the Compressor to Enhance the Volume of a Section in Audacity
Increase Audio Volume Free Online with EaseUS Online Volume Changer
Wrapping up
Audacity Increase Volume FAQs
Dawn Tang
Updated On 03/19/2025
4875 Views |
3 min read
Quick Tips to Increase Volume in Audacity
🎉 To increase volume in Audacity without losing quality, use the Normalize effect. Open Audacity and upload the audio file; select the track and go to "Effect" > "Volume and Compression" > "Normalize…" to open the box; then, set the values, preview the song, and download it.
Boosting audio volume is essential to ensure clear audibility, particularly in situations like presentations or listening to podcasts or older songs containing almost-inaudible low-volume sections. Constantly adjusting the volume on the audio player can be highly irritating and may lead to extreme loudness levels that can damage hearing.
Luckily, there are solutions to this problem in Audacity, an open-source audio editing software and MP3 volume booster available for free. Four different methods are listed in the article to give a clue on increasing audio volume in Audacity without distortion.
| Methods🔊 | Effect📢 | Difficulty📶 |
|---|---|---|
| Amplify the Sound | Amplify all selected tracks by the same amount. | Easy |
| Normalize the Audio | Amplify all selected tracks to the same level. | Easy |
| Use the Envelope Tool | Control the volume changers smoothly over time. | Difficult |
| Apply the Compressor | Boost quiet voice without clipping. | Easy |
1. Amplify the Sound in Audacity
In Audacity, the Amplify effect boosts audio volume while maintaining relative track levels. It adjusts each track uniformly based on the loudest one, ensuring clarity without altering the balance between tracks. However, it may distort if the starting amplification volume is too high.
Step 1. Launch Audacity and import your audio file.
- Go to "File" > "Import" > "Audio" to choose the local file.
- Audacity supports WAV, AIFF, MP3, OGG, FLAC, and MP2. But if it is an advanced audio coding file like M4A, you'll need to install an FFmpeg library.

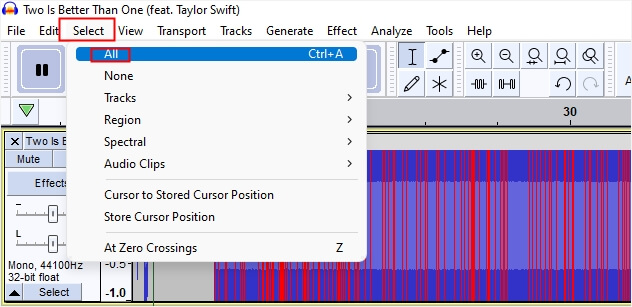
Step 2. Select the target track.
Select a part of the audio track or left-click the mouse twice to select the whole song. Or go up to "Select" > "All."
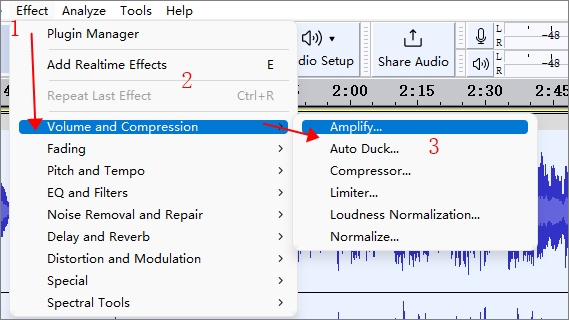
Step 3. Use the Amplify effect.
Move to "Effect" > "Volume and Compression" > "Amplify…" to open the Amplify window. Here you'll see:
- Amplification: Enter a value to amplify the sound. Positive values increase volume, while negative values decrease it. Start with a small value.
- New Peak Amplitude: The highest audio level after applying changes, helping prevent distortion.
- Allow clipping: When unchecked, entering an amplification value causing a New Peak Amplitude over 0 dB disables the OK button, preventing excessive amplification. When checked (default), you can amplify freely, risking distortion.

Step 4. Preview and download.
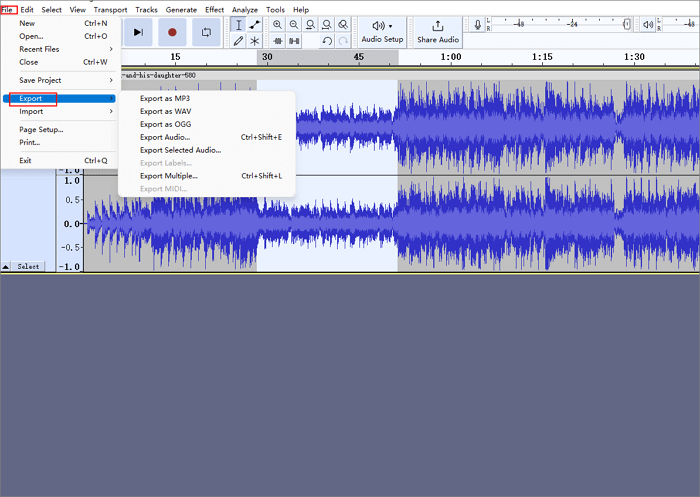
Click "Preview" to listen to it, and tap "Apply" to start the process. Export it from "File" > "Export" > "Export as…"
2. Normalize the Audio to Make it Louder in Audacity
The Normalize effect in Audacity serves to adjust peak amplitudes of tracks or selections, ensuring consistency across multiple tracks and balancing stereo channels. It also removes any DC offset present in the tracks. Unlike independent normalization, which maximizes volume per track or channel, Normalize harmonizes peak amplitudes and channel balance across selections and tracks.
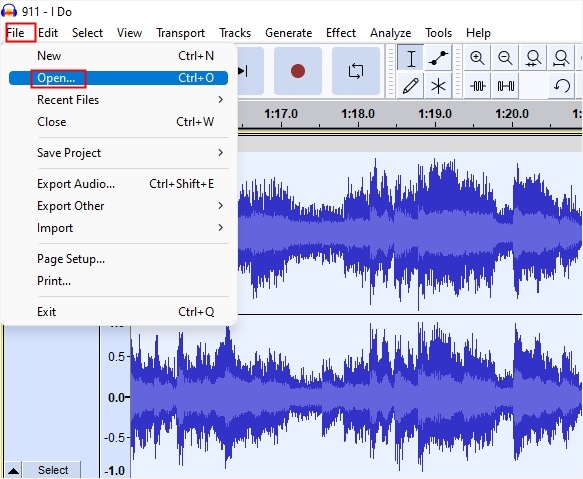
Step 1. Open Audacity and load your recordings.
For those who have already saved their audio file as a project in Audacity, try "File" > "Open…" or "File" > "Recent Files" to open it.
Step 2. Choose the audio track and apply the Normalize effect.
Go to "Effect" > "Volume and Compression" > "Normalize…" to open the box.

- Remove DC offset: It centers the waveform at the 0.0 amplitude level to prevent clicks and distortion and maximize available headroom for normalization.
- Normalize Maximum Amplitude to: Set the maximum level for the processed selection. The default is -1 dB, providing headroom for effects and distortion-free playback. Entering positive values is disabled.
- Normalize stereo channels independently: Unchecked (default), Normalize preserves stereo track balance. Checked, it adjusts left and right channels separately, suitable for correcting unbalanced stereo recordings after removing clicks.

Step 2. Preview and download.
Click "Preview" to play the song, and click "Apply" if you like the result. Export the audio file as needed.
See also:
3. Use the Envelope Tool to Increase the Volume
The Envelope Tool adjusts volume changes smoothly using control points placed in the track. Each point, with four handles, lets you modify volume levels. Dragging handles prevent distortion beyond the original volume envelope, while inner handles amplify quiet audio beyond the track's envelope.
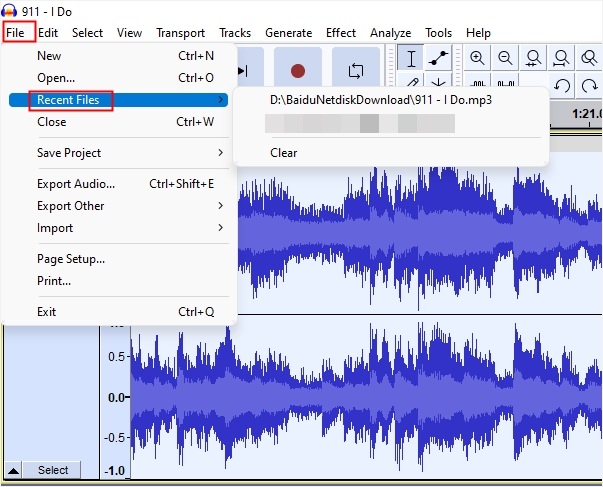
Step 1. Start Audacity and open the audio track.
If you already have a project in Audacity, try "File" > "Recent Files" to open it.
Step 2. Choose the whole audio or part of it.
Step 3. Click the Envelop Tool from the tools bar.
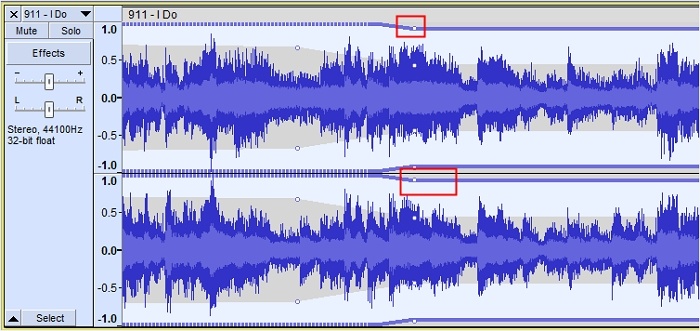
Scroll the mouse and press the Ctrl button to magnify the track, and then click the mouse button on a track to add a new control point. To remove it, drag it outside the track.
The sound will transition smoothly between each point you set, so only add what you need. Click on the top or bottom of a track to add a new point. If your track is stereo, both channels will follow the same changes.

Step 4. Edit the control points.
Click the control point and drag it while pressing the left mouse. Pulling one control point past another is disabled. You can use it to specify changes in volume and toggle a gain slider to adjust volume without altering the waveform.
Step 5. Listen and export.
Once you are satisfied with the final work, export the format you want.
Here's a video streamlining the whole process🎦:
- 0:00 How to make your Audio louder?
- 0:31 Use this Tool in Audacity
- 0:50 Before and After of the audio
- 0:55 Another way to turn up the Audio
- 1:20 Third way to make your Audio Louder

4. Apply the Compressor to Enhance the Volume of a Section in Audacity
In scenarios like presentation recordings where the presenter's mic captures questions from the audience at a lower volume, you may only want to adjust specific parts of the audio volume. This is where the built-in compressor becomes valuable. It reduces the dynamic range of the audio without causing clipping, effectively managing varying volume levels within the recording.
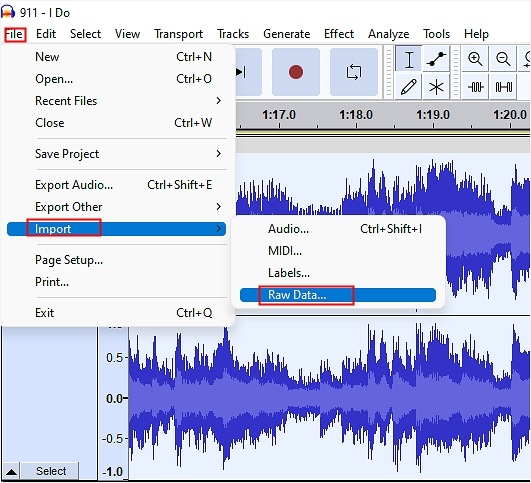
Step 1. Upload your audio file to Audacity and select the target part.
For files without standard headers like RAW or VOX ADPCM or those with non-standard headers, use "File" > "Import" > "Raw Data" to import them in Audacity.
Step 2. Use the Compressor.
Access "Effect" > "Volume and Compression" > "Compressor…" and you'll see the graph.

- Threshold: Compression level value.
- Noise Floor: Control audio gain below background levels to prevent over-amplification.
- Ratio: Reduce audio beyond a threshold. Higher Ratios compress louder parts more.
- Attack Time: Decide how fast it reacts to volume surpassing the threshold. Short attack times react to loud sounds.
- Release Time: Decide how quickly it restores volume after dropping below the threshold. Long release times sacrifice softer sounds after loud ones.
- Make-up gain for 0 dB after compressing: Post-compression, all selected tracks are amplified to reach a peak level of 0 dB, utilizing the same amplification as the Amplify effect.
- Compress based on Peaks: Adjust threshold and gain based on peak waveform values for "upwards" compression, amplifying louder sounds less than quieter ones, contrasting with "downward" compression of RMS, which reduces louder sounds while leaving quieter ones unchanged, with no amplification at the original 0 dB level.

Step 3. Export.
Apply the options and preview. Select the folder to store the audio, and choose the sample rate, audio options, and export range.
Share the tutorial with others who need to increase volume in Audacity without clipping!
Increase Audio Volume Free Online with EaseUS Online Volume Changer
If you prefer a way to automate your workflow, EaseUS Online Volume Changer is the way to go. It is a free audio volume booster supporting multiple file formats like MP3, WAV, M4A, FLAC, and more and enabling the volume to change from 0 to 3x. It has an intuitive interface with easy workflow.
More than that, this best vocal remover also serves as a pitch changer, speed changer, and acapella extractor. The maximum file size limit is 150MB for recordings lasting up to 20 minutes, enabling users to adjust their audio volumes as needed.
Key Features
- Remove noise, instruments, and vocals from songs.
- Decrease and increase the volume.
- Speed up MP3 to 1.5x.
- Find the key of a song.
- Change the pitch of your songs.
Access it now:
Powered by Advanced AI
Follow the steps to amplify sound online:
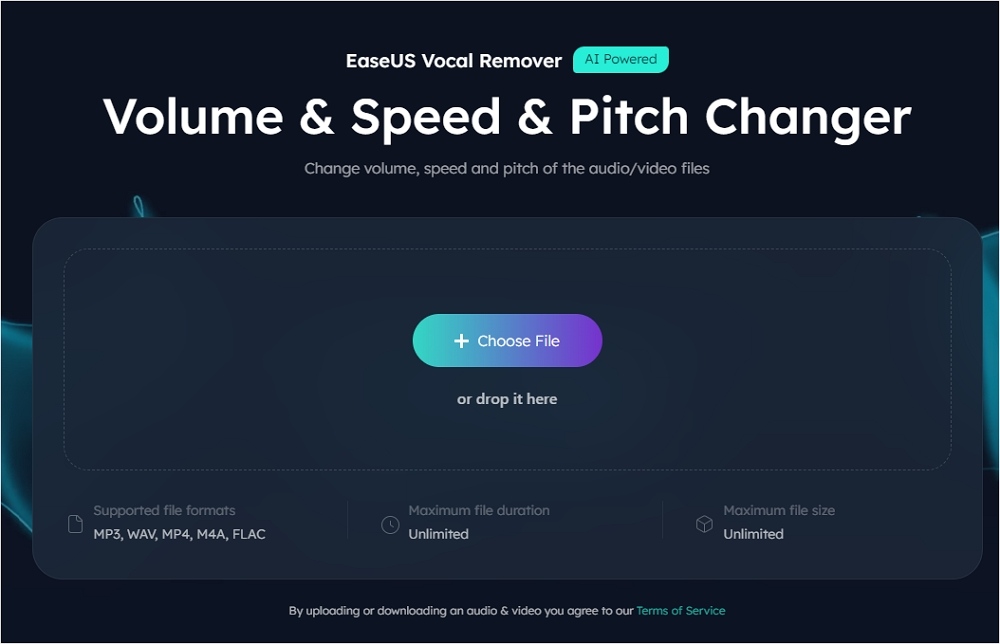
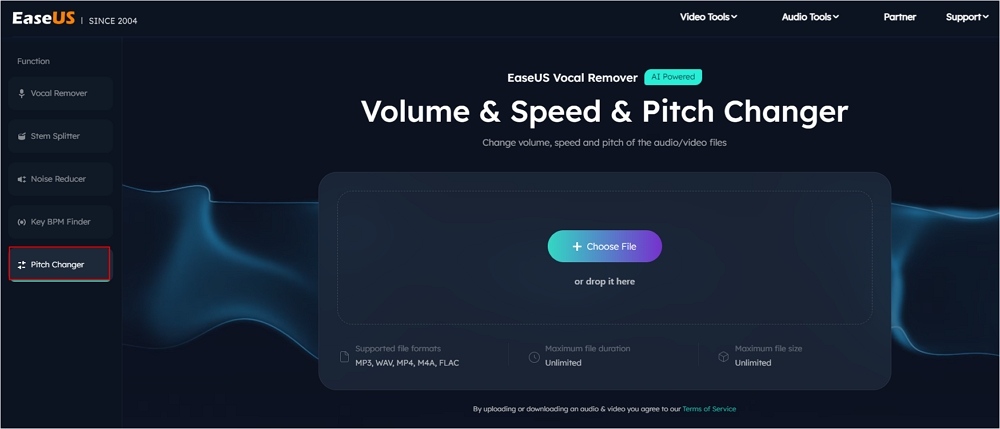
Step 1. Go to the website and find the "Pitch Changer."
Step 2. Browse the local library or drag and drop your file without limit to the area.
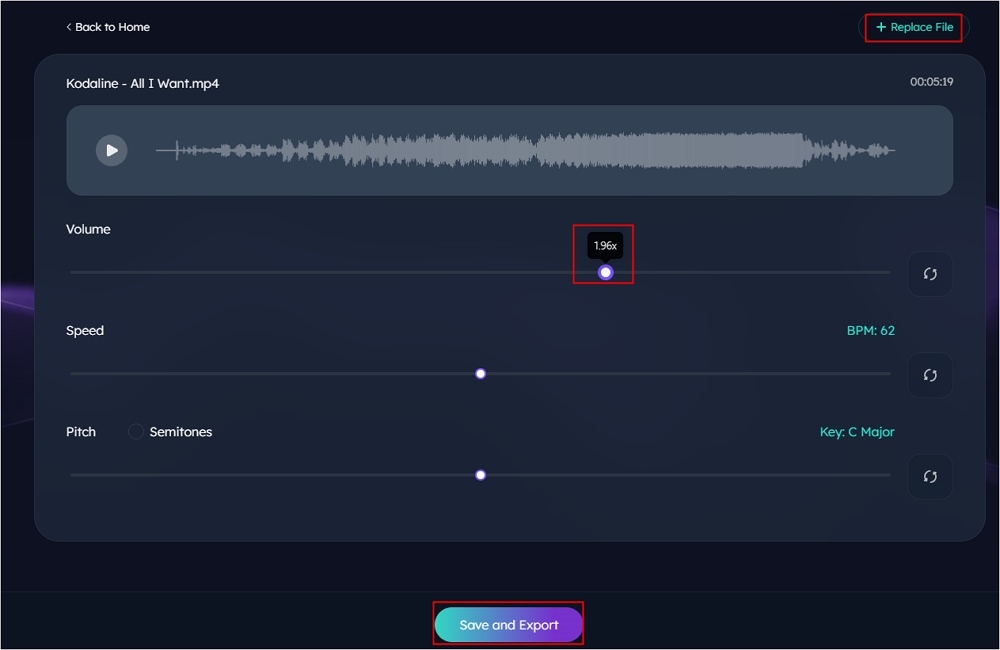
Step 3. Toggle the volume slider to the left or right to adjust the volume from 0-3x. Select "Replace File" for a change. After the adjustment, press "Save and Export" to download the file with volume altered.
Wrapping up
In conclusion, these four methods offer effective ways to increase volume in Audacity without distortion, catering to various user preferences and technical requirements.
However, for those seeking a user-friendly and efficient solution, EaseUS Online Volume Changer stands out as the best free audio volume booster, providing a seamless experience for enhancing audio levels while maintaining clarity and quality.
Powered by Advanced AI
Audacity Increase Volume FAQs
1. How to increase audio volume without losing quality?
For a quick volume boost without altering dynamics:
- Use normalization to bring up the volume of the entire audio file so that the highest peak volume is just below 0 dBFS. This process does not add distortion or clipping.
For producers aiming for a louder sound in the "loudness war":
- Consider using multi-band compression, like the t.c.electronic finalizer, to increase the average volume of the audio without necessarily raising the volume of the highest peaks. This method can make the audio sound louder to human perception.
2. How do I increase volume in Audacity without clipping?
To increase volume in Audacity without clipping:
- Load an audio file in your Audacity.
- Select the track and move up to "Effect."
- Choose "Normalize…" and set the peak amplitude to 0 dB.
- Press "OK" and listen to your recording.
3. Why is my Audacity volume so low?
Your Audacity volume is low:
- Low input levels.
- Improper microphone or recording device settings.
- Effects or filters to reduce the volume are applied.
- The volume levels of individual tracks are set too low.
- The playback volume settings are adjusted incorrectly.
- The audio sample rate is unmatched by the project rate in Audacity.
- Monitor settings for speakers/headphones.