-
Jane is an experienced editor for EaseUS focused on tech blog writing. Familiar with all kinds of video editing and screen recording software on the market, she specializes in composing posts about recording and editing videos. All the topics she chooses are aimed at providing more instructive information to users.…Read full bio
-
![]()
Melissa Lee
Melissa Lee is a sophisticated editor for EaseUS in tech blog writing. She is proficient in writing articles related to screen recording, voice changing, and PDF file editing. She also wrote blogs about data recovery, disk partitioning, data backup, etc.…Read full bio -
Jean has been working as a professional website editor for quite a long time. Her articles focus on topics of computer backup, data security tips, data recovery, and disk partitioning. Also, she writes many guides and tutorials on PC hardware & software troubleshooting. She keeps two lovely parrots and likes making vlogs of pets. With experience in video recording and video editing, she starts writing blogs on multimedia topics now.…Read full bio
-
![]()
Gloria
Gloria joined EaseUS in 2022. As a smartphone lover, she stays on top of Android unlocking skills and iOS troubleshooting tips. In addition, she also devotes herself to data recovery and transfer issues.…Read full bio -
![]()
Jerry
"Hi readers, I hope you can read my articles with happiness and enjoy your multimedia world!"…Read full bio -
Larissa has rich experience in writing technical articles and is now a professional editor at EaseUS. She is good at writing articles about multimedia, data recovery, disk cloning, disk partitioning, data backup, and other related knowledge. Her detailed and ultimate guides help users find effective solutions to their problems. She is fond of traveling, reading, and riding in her spare time.…Read full bio
-
![]()
Rel
Rel has always maintained a strong curiosity about the computer field and is committed to the research of the most efficient and practical computer problem solutions.…Read full bio -
![]()
Dawn Tang
Dawn Tang is a seasoned professional with a year-long record of crafting informative Backup & Recovery articles. Currently, she's channeling her expertise into the world of video editing software, embodying adaptability and a passion for mastering new digital domains.…Read full bio -
![]()
Sasha
Sasha is a girl who enjoys researching various electronic products and is dedicated to helping readers solve a wide range of technology-related issues. On EaseUS, she excels at providing readers with concise solutions in audio and video editing.…Read full bio
Content
Dawn Tang
Updated On 08/16/2024
0 Views |
0 min read
In 2023, making your videos accessible to a diverse audience has become more crucial than ever. Adding subtitles to videos is one such popular practice. Closed captioning is a powerful tool to ensure everyone can enjoy and understand your video content, regardless of hearing capabilities or language preferences.
In this guide, we'll explore five effective ways to add closed captioning to your videos. Whether you're a beginner or a seasoned video creator, these methods will help you enhance the accessibility and impact of your videos in the digital landscape of 2023 and beyond.
| Methods | Effectiveness | Recommendation |
|---|---|---|
| EaseUS VideoKit | Add the subtitles to a video automatically using AI in seconds. | ⭐⭐⭐⭐⭐ |
| VEED | Add the subtitles to a video automatically or manually. | ⭐⭐⭐⭐ |
| Premiere Pro | Transcribe speech to text and create captions using AI. | ⭐⭐⭐⭐ |
| Canva | Add the subtitle manually. | ⭐⭐⭐ |
| iMovie | Customize and create captions manually. | ⭐⭐⭐ |
Open Captions vs. Close Captions vs. Subtitles
Open Captions, Closed Captions, and Subtitles are all text-based elements used in video content to convey spoken dialogue, narration, or other audio information to the audience. However, they have some distinct characteristics:
🎞️Open Captions: Open captions are permanently embedded in the video and cannot be turned off or disabled. They are always visible to the viewers and are suitable for audiences who are deaf or hard of hearing and also for viewers who may not understand the language spoken in the video.
🎥Closed Captions: Closed captions can be turned on or off by the viewers. Provided in a separate file format (such as SRT or VTT) and synced with the video's audio, they are used for providing accessibility while maintaining a cleaner visual experience for viewers who don't need the captions.
📺Subtitles: Subtitles are text translations of the video's dialogue or narration. They are primarily used when the video's audio is in a different language from the viewers' native language. Like closed captions, subtitles can also be turned on or off by the viewers. The main difference is that subtitles focus on translating the spoken content rather than describing other audio elements like sound effects.
Add Closed Captioning to A Video in 5 Ways
1. Using EaseUS VideoKit🥇
Now, we know the major differences between subtitles and captions. You can add captions to YouTube videos using YouTube Studio, be they open or close ones. And there are four different ways to do so.
EaseUS VideoKit, a powerful AI-driven video editor and background noise remover, is a must-have for Windows and macOS users. It features an automatic subtitle generator, offering various formats like SRT and TXT.
The tool also provides over 200 font choices and customizable font colors. Additionally, it excels as a vocal remover to remove distortion from audio and video. With support for 1000+ audio and video formats, it guarantees a smooth experience for both beginners and experts.
Here's a guide for generating closed captions in a video using EaseUS VideoKit.
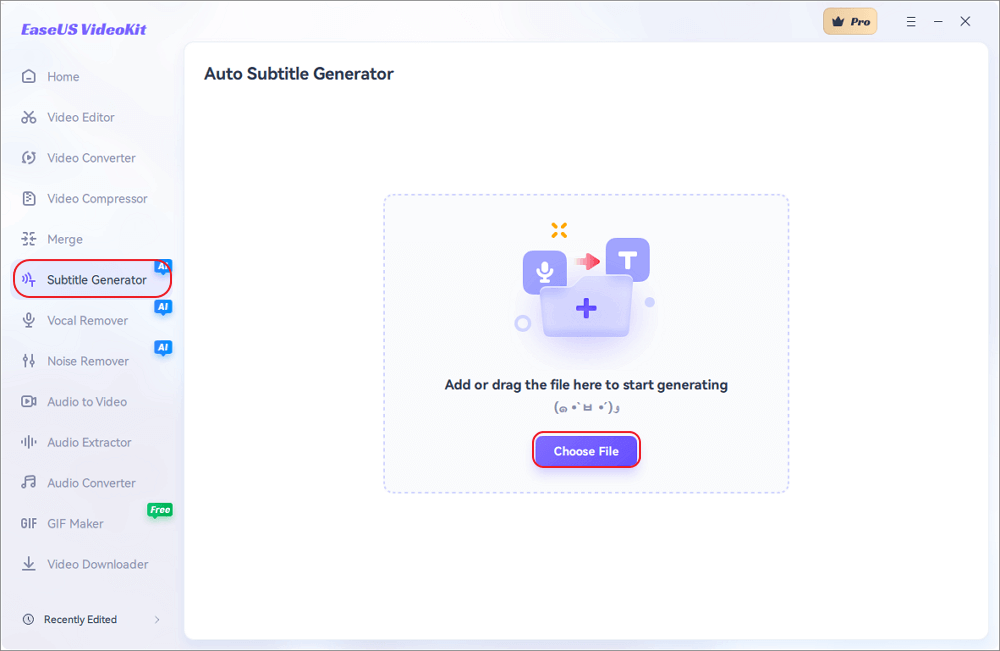
Step 1. Open EaseUS VideoKit and find the "Subtitle Generator" panel.
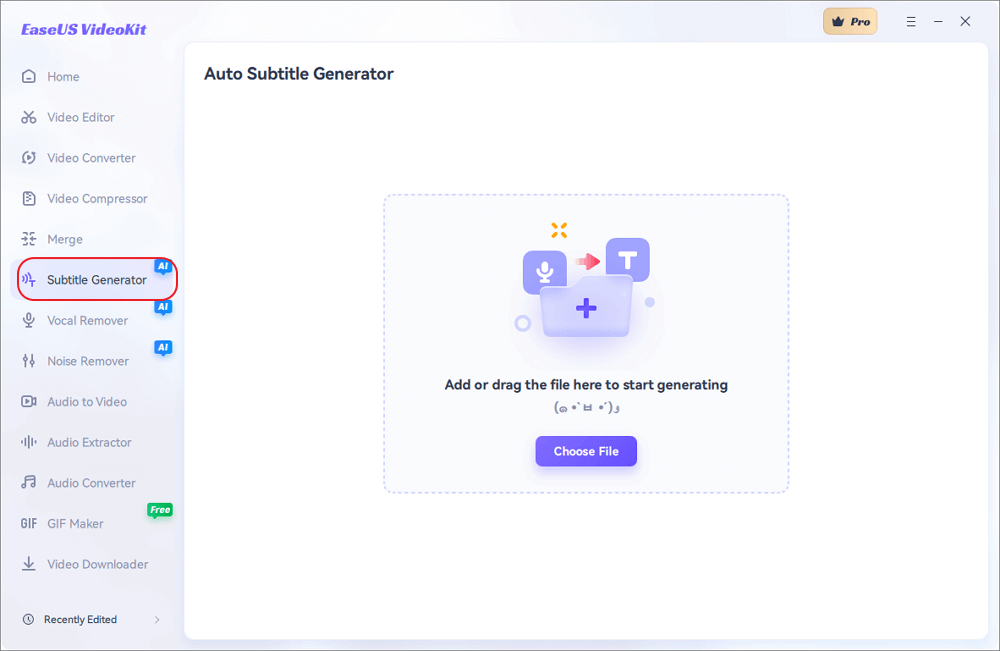
Step 2. Click "Choose File" or drag the YouTube video file to the interface.
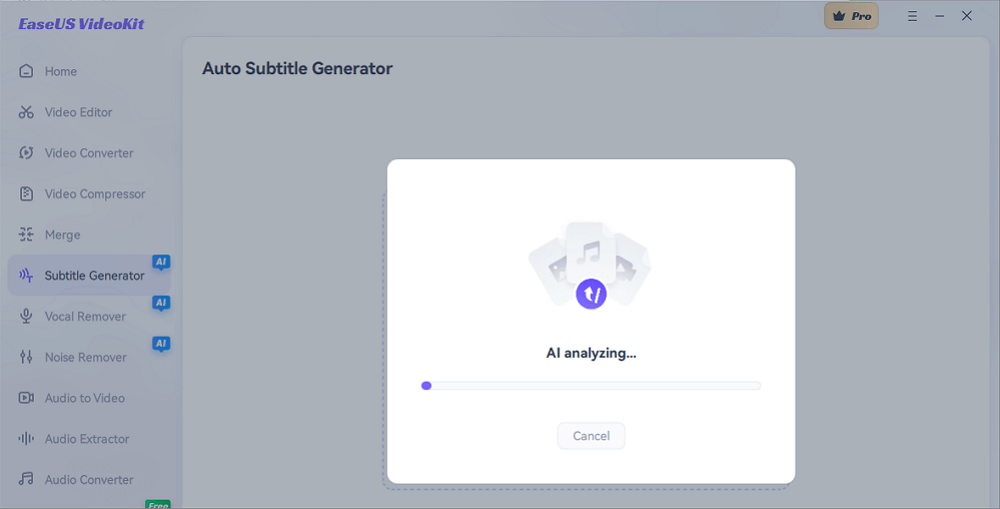
Step 3. Wait for the AI analyzing.
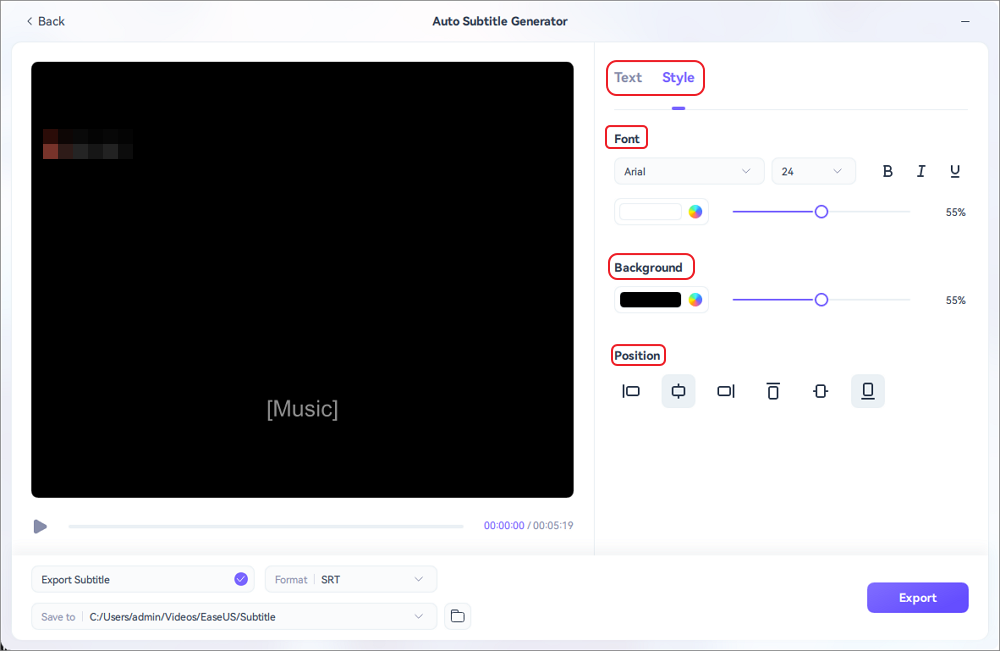
Step 4. Click the "Text" button to change the text, or customize font, background, and position under "Style" menu.
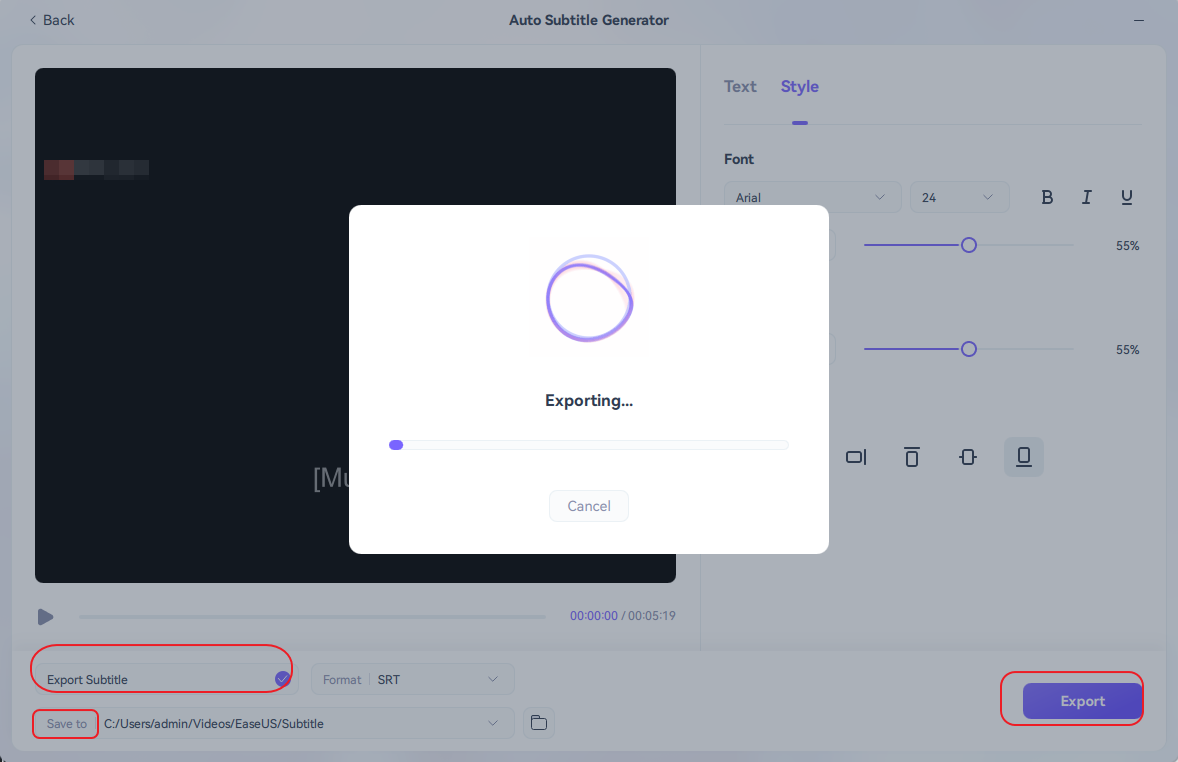
Step 5. Click "Export Subtitle" to select exported subtitle format, "Save to" to change location, and press "Export" to export the video with subtitles.
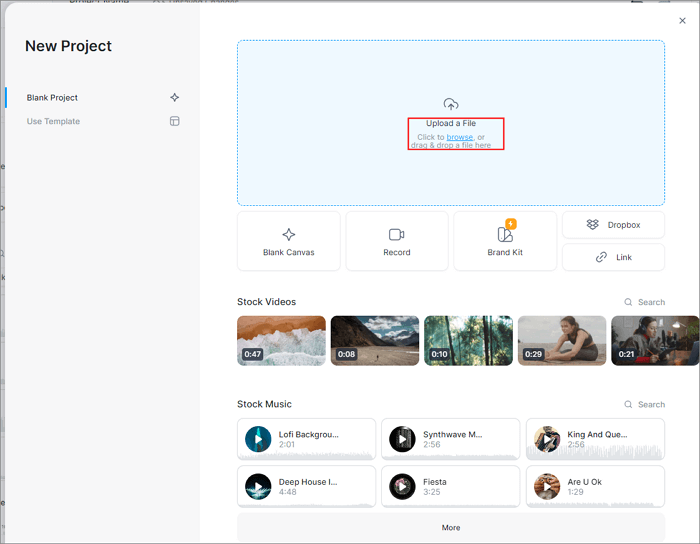
2. Using VEED🥈
VEED is a comprehensive online video production platform that offers a range of professional features, such as video editing, recording, and hosting capabilities. It also serves as a convenient and free automatic subtitle generator, allowing users to upload various video file formats like MP4, MKV, MOV, FLV, AVI, and more.
The platform's cloud-based nature ensures easy access to videos from any location. You can add subtitles to your videos manually or automatically. Here's how:
Step 1. Visit VEED and click "Choose File" > "Upload a File."
Step 2. Move to the "Subtitles" tab and select the way.

Step 3. Choose the language from the drop-down list and check "Add automatic highlighting." Press "Create Subtitles."

Step 4. Wait for it to generate subtitles and stylize your subtitles.

Step 5. Preview and export the video.

Or watch the video for a visual presentation.👀
- 0:00 Intro
- 0:16 Tutorial
- 2:54 Features
- 3:48 Outro
3. Using Premiere Pro🥉
Adobe Premiere Pro stands as an elite video editing software and the best vocal remover favored by professionals, boasting essential tools for crafting high-quality video content. With seamless transitions, stunning effects, and precise color grading, it caters to film and media experts.
Its wide array of features makes it a top choice, but novices might find its complexity and resource requirements daunting. The software's compatibility includes Windows 10 and 11, as well as macOS, and it supports various video formats. And you can work with captions in the timeline and stylize them as you like. Add subtitles in Premiere Pro automatically as the following:
Step 1. Open Premiere Pro and go to "Sequence" > "Captions" > "Add New Caption Track" to choose the subtitle option.
Step 2. Go to "Windows" > "Text" and hit "Transcribe Sequence" in the "Captions" tab.

Step 3. Select the language, speakers, and audio track from the drop-down.
Step 4. Click "Create" and wait for a few minutes.
Step 5. Click "Play" to check and modify the transcription in the captions panel.
Step 6. Choose "Transcriptions" > "Create Captions" > "Create."
4. Using Canva🏅
Canva is a free online graphic design tool and video editor that allows you to crop, trim, split, speed up, and resize video clips. It offers drawing, diverse elements, design templates, and audio removal and allows you to add subtitles on TikTok.
You can add customizable text and access a vast media library. Enhance with licensed music, voice-overs, and Beat Sync for automatic audio synchronization. You can manually add captions to a video with this tool.
Step 1. Enter the Canva website and click "Create a design" > "Video."
Step 2. Press "Uploads" > "Upload files."
Step 3. Click "Text" and add a heading, subheading, and body text to the text box for your videos.

Step 4. Stylize your subtitles by choosing the fonts, size, effects, and more.
Step 5. Click "Share" to send your work to social media or "Download" it.
Help others explore the world of closed captioning by sharing this article now!
5. Using iMovie🎖️
iMovie, Apple's free video editing app for Mac, iPhone, and iPad, offers a user-friendly experience with various effects, color correction, and audio enhancements. Users can create cutaways, green/blue screen effects, and split-screen or picture-in-picture effects.
While there isn't a dedicated caption feature, you can still add subtitles to MP4 using title styles, adjusting font size, color, and positioning. Detailed instructions on using the Title Overlay feature are provided below.
Step 1. Start iMovie and import the video you want to add subtitles to.
Step 2. Drag the video clip to the timeline.
Step 3. Click "Titles" from the menu and choose "Lower" or other styles.
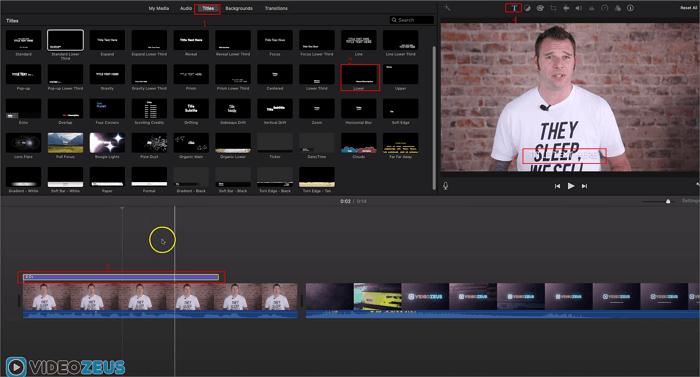
Step 4. Type 6-second text and adjust the duration.
Step 5. Copy and paste the text along the film strip.
Step 6. Add captions for each segment, and use brackets for meaningful sounds.
See also:
Wrapping up
In conclusion, adding closed captioning to your videos has never been easier with these five effective methods. Whether you choose manual captioning, utilize automatic transcription services, leverage YouTube Studio, or explore the capabilities of tools like iMovie, the options are abundant and cater to various needs and preferences.
From manual captioning to using EaseUS VideoKit's AI-powered automatic subtitle generator, you have a range of options to ensure your videos are accessible to all audiences.
Add Closed Captioning to A Video FAQs
1. How do I add closed captions to a video for free?
To add closed captions to a video for free, you can use various online tools and software. Here's a step-by-step guide to help you through the process:
- Prepare the video and create a caption file in SRT or VTT format.
- Use free online tools like YouTube Studio, Kapwing, or Amara.
- Upload your video and add the captions manually or upload the caption file.
- Sync the captions with the video's audio.
- Review and save the video with closed captions.
- Share or embed the video as needed.
2. Is there an app that adds captions to videos?
There are several apps that add captions to videos, such as EaseUS VideoKit, iMovie, Premiere Pro, Clips, etc. These apps offer user-friendly tools to add, customize, and sync captions with your videos. Simply choose an app that suits your needs, upload your video, and add captions effortlessly.
3. Is there an app that adds closed captions to videos I've made?
Yes, there are apps that add closed captions to your videos, like VEED, InShot, Rev, Autocap, or Clipomatic. These apps offer user-friendly tools for adding and customizing closed captions to make your videos accessible.