-
Jane is an experienced editor for EaseUS focused on tech blog writing. Familiar with all kinds of video editing and screen recording software on the market, she specializes in composing posts about recording and editing videos. All the topics she chooses are aimed at providing more instructive information to users.…Read full bio
-
![]()
Melissa Lee
Melissa Lee is a sophisticated editor for EaseUS in tech blog writing. She is proficient in writing articles related to screen recording, voice changing, and PDF file editing. She also wrote blogs about data recovery, disk partitioning, data backup, etc.…Read full bio -
Jean has been working as a professional website editor for quite a long time. Her articles focus on topics of computer backup, data security tips, data recovery, and disk partitioning. Also, she writes many guides and tutorials on PC hardware & software troubleshooting. She keeps two lovely parrots and likes making vlogs of pets. With experience in video recording and video editing, she starts writing blogs on multimedia topics now.…Read full bio
-
![]()
Gloria
Gloria joined EaseUS in 2022. As a smartphone lover, she stays on top of Android unlocking skills and iOS troubleshooting tips. In addition, she also devotes herself to data recovery and transfer issues.…Read full bio -
![]()
Jerry
"Hi readers, I hope you can read my articles with happiness and enjoy your multimedia world!"…Read full bio -
Larissa has rich experience in writing technical articles and is now a professional editor at EaseUS. She is good at writing articles about multimedia, data recovery, disk cloning, disk partitioning, data backup, and other related knowledge. Her detailed and ultimate guides help users find effective solutions to their problems. She is fond of traveling, reading, and riding in her spare time.…Read full bio
-
![]()
Rel
Rel has always maintained a strong curiosity about the computer field and is committed to the research of the most efficient and practical computer problem solutions.…Read full bio -
![]()
Dawn Tang
Dawn Tang is a seasoned professional with a year-long record of crafting informative Backup & Recovery articles. Currently, she's channeling her expertise into the world of video editing software, embodying adaptability and a passion for mastering new digital domains.…Read full bio -
![]()
Sasha
Sasha is a girl who enjoys researching various electronic products and is dedicated to helping readers solve a wide range of technology-related issues. On EaseUS, she excels at providing readers with concise solutions in audio and video editing.…Read full bio
Content
Dawn Tang
Updated On 09/25/2024
0 Views |
0 min read
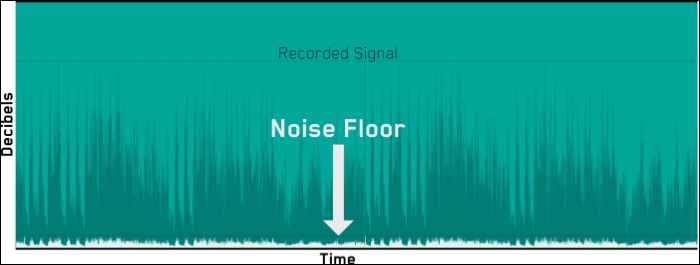
You are mixing your audio and suddenly realize there's unwanted noise, even when you have recorded the audio with a perfect recording setup. Well, that's Noise Floor, and by the time you realize it, the whole audio gets affected. Now, how do you remove background noise from audio?
In this post, we will see what is Noise Floor and how to remove it using the best vocal remover in detail, along with the best vocal remover to generate professional audio tracks. Stay Tuned.
What Is Noise Floor
Noise Floor Definition📒
The technical definition goes like "Noise Floor refers to the sum of all the electrical noises generated by the electrical devices within a measuring system." Why do these systems produce noise? Well, every electronic device produces some sort of noise. As the action takes place, electric devices tend to release some amount of noise naturally.
Not just the recording equipment that contributed to the noise floor, but other electronic devices like Air handlers, computer fans, surroundings, air conditioners, etc. All of these devices introduce some unwanted noise.
Watch the YouTube video to learn what it is📺.
- From 00:30 How Gain Affects Noise Floor
- From 00:58 Minimizing the Noise Floor
- From 01:11 Tactics For Managing Noise Floor
How to Measure Noise Floor?🧮
Noise Floor is any other sound that gets into the audio while recording, so it's measured in decibels (dB). Moreover, the amount of noise floor will dictate how well the weak signals are flushed out from the device. If it is too high, it will dominate the actual vocals or music and make the audio messy. In conclusion, if you want a professional sound recording, you need to keep it as low as possible.
Signal-To-Noise Ratio (SNR)
Another critical parameter to measure the noise floor in music is the Signal-to-noise ratio. It is the ratio of the level of wanted audio signal to the level of unwanted noise induced into the signal. Like the noise floor, SNR is measured in decibels (dB). The higher the SNR, the better the audio quality.

Let's just assume the SNR of any recording device is around 60 dB. Since the dB is measured on a logarithmic scale, the level of the wanted audio signal is 1024 times higher than the level of background noise.
A device with good SNR tends to remove distortion from audio signals much better (in fact, dominate them). Now, what is considered a good SNR ratio? Ideally, most microphones with SNR 80 dB are considered as good. This measurement will vary for different devices.
What Causes Noise Floor?📜
Not only did the tech change the kind of audio equipment and software to reduce the external noise, but at the end of the day, it's just another electrical device. We cannot avoid the things that cause the noise floor, so here are some causes of Noise Floor:
- Ground Loops: They occur when there exists a difference in ground value between two pieces of equipment. We can avoid ground loops by using balanced cables.
- Electrical Noises: Any unwanted signal or noise that interferes with your audio from power cables, lights, computers, etc.
- Electromagnetic Waves: Phones, routers, and devices that transmit or receive signals emit electromagnetic waves, and eventually, they induce some buzzing sound into the recording setup.
- Interference: Another noise that gets generated while using wireless devices like microphones.
- Equipment Noise: The recording equipment like microphones, audio interfaces with cheap preamps, and audio software generate the noise, too.
Fellow artists like us need this information to reduce noise floor while recording. Share this post on social media handles to spread how to improve the audio quality.
How to Fix Noise Floor
While all of these may seem exorbitant, you can still the noise floor to a great extent just by following some simple measures while recording:
1. Try to plug all your gear directly into the wall, and do not have any power line physically touch or run parallel to the audio cable.
2. Reduce the electrical noise as much as possible. Turn off the air conditioners, fridges, electronic devices, and equipment you are not using. Also, keep your Windows closed to eliminate noise from your surroundings.
3. Position all your microphones and instruments that record sound to minimize computer noise due to fans, hard drives, or any whirring sound.
4. Invest in quality microphones, preamps, vocal remover apps, and recording equipment to help yourself while mixing and mastering by reducing noise floor beforehand.
5. Gain Staging is where you set up the optimal gain levels for every stage of the signal chain to remove background noise in Final Cut Pro and editing apps and improve the signal-to-noise ratio.
6. The Software measures to tackle the Noise Floor are noise gates and noise reduction software. Both tools help you remove certain threshold signals like noise floor to achieve better sound quality.
Remove Noise Floor in Your Recordings
Some or the other way, the noise floor gets into your recordings. We may not remove it completely, but there are certain software which help you minimize them.
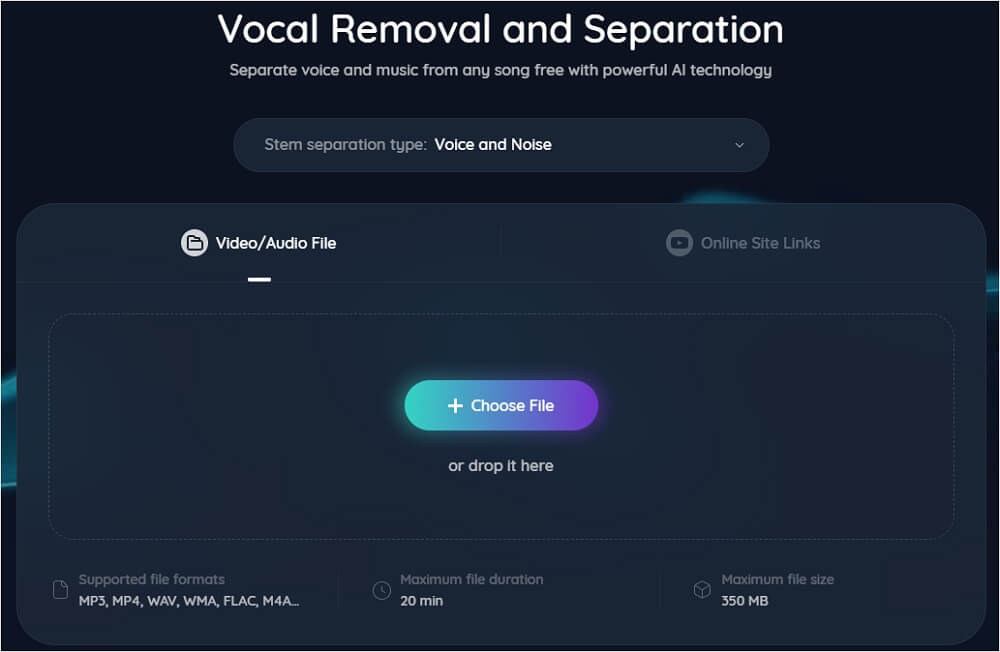
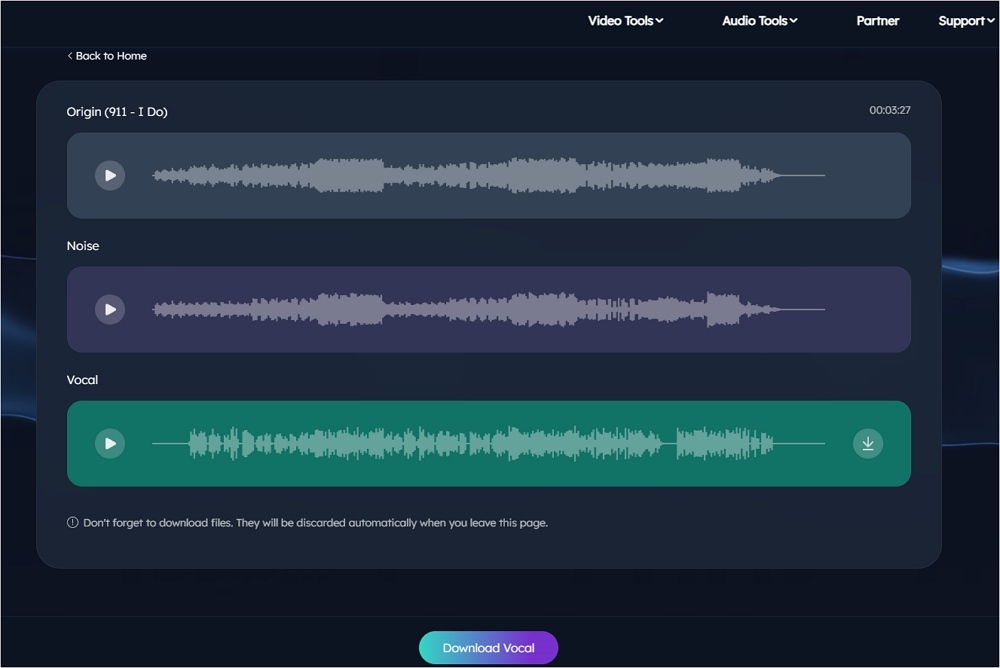
1. Delete Noise Floor Online with EaseUS Vocal Remover
💻Compatibility: Web
💵Price: Free
The easiest way to remove noise floor is to use EaseUS online Vocal Remover. With advanced AI algorithms, you can get accurate audio by removing the external noise. The software renders the song to remove unwanted noises to get the crystal-clear tracks of instruments and vocals. Click the link below, upload any audio, and see the audio quality yourself. The upcoming features help you remove vocals from YouTube links and SoundCloud.
🪄Features:
- Web-based and free software.
- There is no file limit; you can extract music from files up to 350MB.
- Excellent MP3 voice remover and supports audio formats.
Powered by Advanced AI
Delete Noise Floor Online
Step 1. Visit the website and select the "Noise Reducer" option.
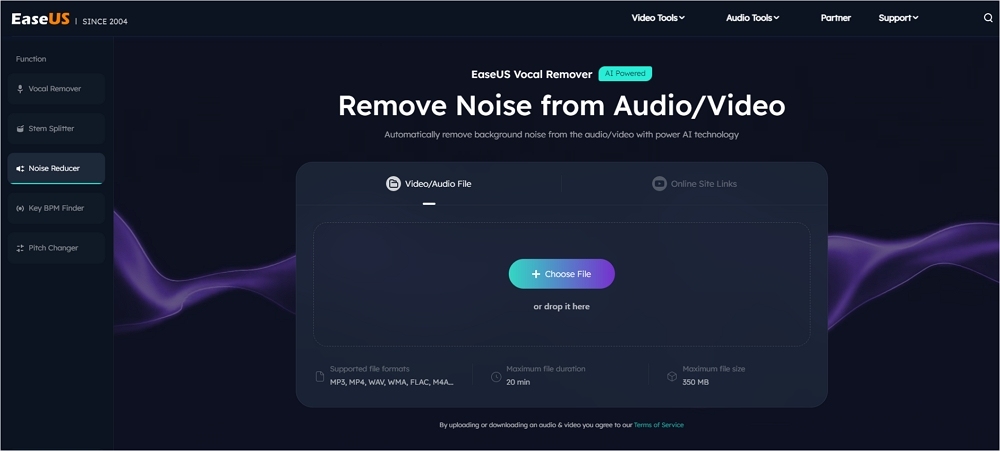
Step 2. Click "Choose File" or drag and drop the file in the area and wait for the AI analysis.
Step 3. Download the final work with noise removed.
2. Audacity
💻Compatibility: Windows, macOS, and Linux
💵Price: Free
🪄Features: A professional audio tool trusted by many, easy to use.
Audacity is a free and open-source platform for acoustic treatment. You can record, edit, and remove noise from audio or music files using Audacity. With the tool, we will define a noise profile of the noise floor and use it to remove echo from audio in Audacity.
Notice that the noise profile works like a filter, so if you have any important sounds in that range, they will be eliminated, too.
Guide to lower noise floor using Audacity:
Step 1. Open the track you want to remove the noise floor.
Step 2. Since the noise floor is constant throughout the audio, make sure you select a section of audio that contains only the noise floor. In other cases, make sure you select a section that does not contain any voices.

Step 3. Navigate to "Effect" > "Noise Reduction". A Noise Reduction window appears; click "Get Noise Profile" and "OK" to generate.

- Tip
- You can also use Noise Reduction, Sensitivity, and Frequency Smoothing to make your desired noise profile.
Step 4. Now, go back and select the entire track. Open the "Noise Reduction" window again and click "OK" for Audacity to do its magic.
3. Reduce Noise Floor in Ableton
💻Compatibility: Mac and Windows
💵Price: Offers a 30-day trial period. The paid plans start from $79 and range all the way to $599
🪄Features: Noise Gate is an effective method to remove noise
Abelton is a flexible and fast tool for creating music, editing, and mastering it. This software provides Noise Gate, a feature to define the parameters of unwanted sound and remove it from the audio to nullify the noise floor. This acts like a low pass and high pass filter, which also helps to separate vocals from background noise.
However, it may eliminate actual sounds, as it filters out all the noises under the threshold.
Step 1. Open the app and load the audio recording into it.

Step 2. To add the Gate audio effect, go to "Live's Browser," click "Audio Effects," and drag and drop the "Gate" plugin onto the audio.

Step 3. Adjust the Gate Plugin
Set the "Return" and "Floor" knobs to 0.00dB. This action drops the audio to 0 dB whenever the audio is below the threshold.
Adjust the "Threshold" just above your noise floor to eliminate noise. Set the "Release" time to ensure words and phrases end smoothly. Ideally, it should be between 50-150ms.

Step 4. Once you get the desired audio, click on "File" > "Export."

Final Words
Now that you know what noise floor is at your disposal, you must eliminate it to make great music. In this post, you see a detailed discussion of what noise floor is, how to measure it, and how to reduce it. The post also introduces three spectacular tools to lower the noise floor.
While Audacity and Abelton need you to go through a learning curve, we suggest using EaseUS online vocal remover. Upload your file, and the tool does its magic with the advanced AI algorithms to remove noise floors.
Powered by Advanced AI
FAQs About What Is Noise Floor in Audio
Here are some of the most frequent FAQs asked on what is Noise Floor. I hope you find these queries helpful.
1. What is the noise floor in a room?
The noise floor in a room refers to the amount of unwanted noise induced into the audio recording due to all the electrical equipment inside a room. If no signal is running into the system, and yet the sound occurs, it is due to the noise floor.
2. What is a good noise floor level?
Though a tricky question, if you notice any kind of noise floor, it is too loud. As we cannot avoid the noise floor, we need to make sure to record quality audio to minimize noise floor. If your peaks are around -6dB, the noise floor should be a maximum of -60 dB.
3. What is the acceptable noise floor for WiFi?
In Wi-Fi networks, the noise floor is due to background radio frequency and noise in the wireless spectrum. In homes and small office spaces, the acceptable range is around -90 dB to -120 dB. But for enterprise-level structures, -90 to -100 dB is fine.