-
![]()
Sofia Albert
Sofia has been involved with tech ever since she joined the EaseUS editor team in March 2011 and now she is a senior website editor. She is good at solving various issues, such as video downloading and recording.…Read full bio -
![]()
Melissa Lee
Melissa Lee is a sophisticated editor for EaseUS in tech blog writing. She is proficient in writing articles related to screen recording, voice changing, and PDF file editing. She also wrote blogs about data recovery, disk partitioning, data backup, etc.…Read full bio -
Jean has been working as a professional website editor for quite a long time. Her articles focus on topics of computer backup, data security tips, data recovery, and disk partitioning. Also, she writes many guides and tutorials on PC hardware & software troubleshooting. She keeps two lovely parrots and likes making vlogs of pets. With experience in video recording and video editing, she starts writing blogs on multimedia topics now.…Read full bio
-
![]()
Gorilla
Gorilla joined EaseUS in 2022. As a smartphone lover, she stays on top of Android unlocking skills and iOS troubleshooting tips. In addition, she also devotes herself to data recovery and transfer issues.…Read full bio -
![]()
Rel
Rel has always maintained a strong curiosity about the computer field and is committed to the research of the most efficient and practical computer problem solutions.…Read full bio -
![]()
Dawn Tang
Dawn Tang is a seasoned professional with a year-long record of crafting informative Backup & Recovery articles. Currently, she's channeling her expertise into the world of video editing software, embodying adaptability and a passion for mastering new digital domains.…Read full bio -
![]()
Sasha
Sasha is a girl who enjoys researching various electronic products and is dedicated to helping readers solve a wide range of technology-related issues. On EaseUS, she excels at providing readers with concise solutions in audio and video editing.…Read full bio
Content
Way 1. Lower the Background Noise Volume
Way 2. Use Noise Gate
Way 3. Use Equalizer
Alternative Ways to Remove Background Noise from Audio
To Conclude
FAQs on Removing Background Noise from Audio in Sony Vegas
Sasha
Updated On 03/27/2025
5744 Views |
5 min read
One common challenge users encounter is the presence of background noise in their audio recordings. Background noise can detract from the overall quality of audio projects. Sony Vegas is a renowned and powerful audio editing software and offers various methods to extract clear voice from a noisy audio file.
With features such as lowering the volume and utilizing noise gates, users can diminish background noise and enhance the clarity of their audio recordings. This article mentions the effective ways to remove background noise from audio in Sony Vegas. Here, we'll explore effective ways and practical tips to separate vocals from background noise.
Way 1. Lower the Background Noise Volume
You can employ various methods within Sony Vegas to lower the background noise volume. One straightforward approach is to lower video volume, which can effectively diminish background noise profiles.
Often, background noise exists at lower volume levels, forming a baseline or "floor" within the audio. By reducing the overall volume, the volume of the noise is pushed below this floor. In VEGAS Pro, this can be achieved by sliding the volume slider in the track header to decrease the volume of all audio events within that track. For finer control, the volume of individual events can be lowered by adjusting the Gain level. This method works particularly well when the main voice signal is stronger than any background noise. The background noise persists or if the microphone is close to the source of the unwanted noise.
Follow these steps to lower the overall volume of video in Sony Vegas:
Step 1. Select the track containing the audio clip with the background noise on the Timeline.
Step 2. Locate the volume slider in the track header. Slide it to the left to decrease the volume of all audio events within that track.

Step 3. Click on the specific audio clip in the timeline until you see the Gain level indicator.

Step 4. Click on the top of the audio event to select it.
Step 5. Drag the Gain level down to decrease the volume of that particular event.
Way 2. Use Noise Gate
Noise Gate is another solution for addressing background noise, especially when the noise volume is comparable to the desired audio signal. This feature eliminates any sound below a specified volume threshold. Adjusting the Threshold level slider determines the volume level below which sounds are eliminated. However, the challenge lies in ensuring the desired audio isn't cut off. Fine-tuning the Attack Time and Release Time sliders helps mitigate this issue by adjusting the aggressiveness of the Noise Gate.
Follow these steps to remove background noise in Noise Gate:
Step 1. Right-click on the track containing the audio clip with the background noise.
Step 2. Select "Apply Non-Real-Time Audio Event FX."

Step 3. Select "Track Noise Gate."

Step 4. Click "OK" to apply the selected effects.
Step 5. The Audio Track FX window will open, displaying controls for the selected effects. Click on the Noise Gate effect to access its settings.
Step 6. Adjust the threshold level slider to determine the volume level below which the Noise Gate will activate and reduce the audio volume.
Step 7. Use the Attack and Release sliders. The Attack slider (0-500ms) controls the audio if it drops below the threshold. The release slider (1-5000ms) determines how rapidly it disengages once the volume rises above the threshold.

Step 8. Preview the audio track with the applied Noise Gate effect enabled.
See also:
Way 3. Use Equalizer
Utilizing an Equalizer offers a targeted approach to reducing background noise by controlling specific frequencies or ranges of frequencies in the audio. If the background noise is predominantly present at specific frequencies, the EQ can lower the volume of those frequencies. Lowering the volume of low frequencies can help reduce hums or rumbles, while reducing higher frequencies addresses hisses or high-pitched sounds. This method offers precise control over specific frequency ranges to remove echo from audio. Users can effectively reduce background noise without significantly impacting the overall audio quality.
Follow these steps to use Equalizer in Sony Vegas:
Step 1. Select "Track FX" from the track header and choose "Audio Events FX."
Step 2. Select "Track EQ" to access the EQ controls. In the EQ controls, you'll see a graphical representation of frequency bands as a flat line connected by four dots. Each dot corresponds to a specific frequency range, with the first dot representing lower frequencies and the fourth dot representing higher frequencies.

Step 3. Click and drag the dots to manipulate the volume levels of the corresponding frequency ranges.
Step 4. Lowering the volume of lower frequencies can reduce the background noise like hums or rumbles. Reducing higher frequencies can mitigate hisses or other high-pitch sounds.
Step 5. Select the desired frequency range.
Step 6. Preview the audio after making EQ adjustments to assess the effectiveness of your changes.
Step 7. Listen carefully and make additional adjustments if necessary to achieve the desired balance between background noise reduction and maintaining the clarity of the audio.
📺Watch this YouTube Video to learn a detailed visual guide on removing background noise in Sony Vegas!

Alternative Ways to Remove Background Noise from Audio
While Sony Vegas offers features to adjust the background noise from audio, you can also opt for better free tools.
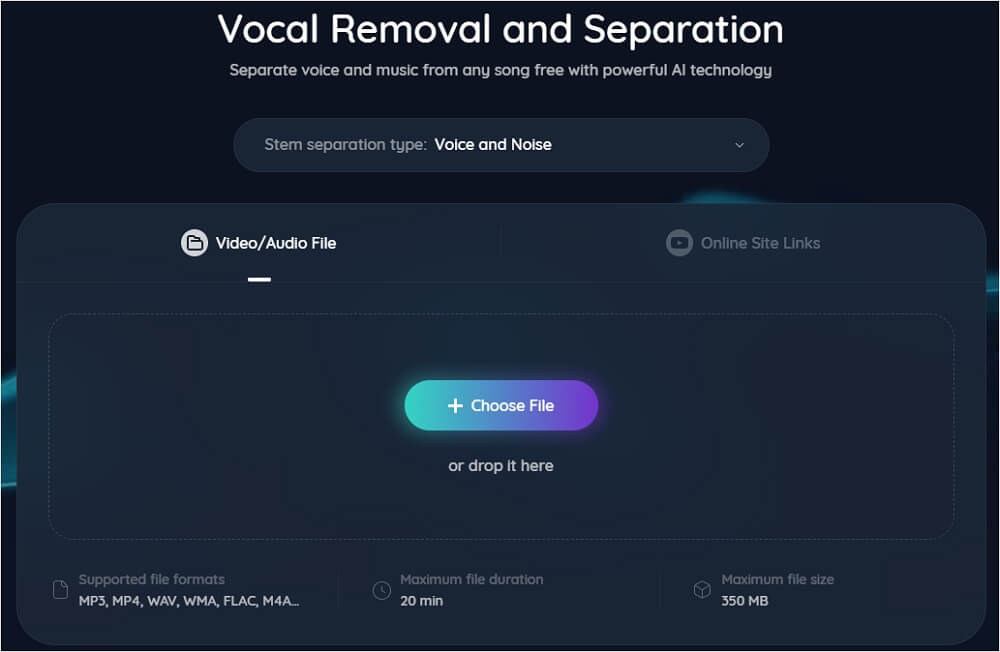
EaseUS Noise Reducer
EaseUS Noise Reducer is a versatile AI tool that removes background noise from audio recordings. This intuitive online tool uses advanced AI algorithms to analyze audio and identify unwanted vocal elements. It can remove background noise accurately. Users can upload their audio files directly to the platform and start the noise-removal process with just a few clicks. EaseUS Noise Reducer offers customizable settings to adjust parameters such as noise reduction level and sensitivity. The tool provides real-time previews to analyze the results before finalizing the noise removal operation.
- Advanced Noise Reduction: It uses sophisticated AI algorithms to effectively identify and remove background noise.
- Ambient Noise Removal: It specifically targets and eliminates persistent ambient noise, ensuring clean and distortion-free audio.
- User-Friendly Interface: The intuitive interface allows users to initiate the noise reduction process easily.
- Customizable Settings: It provides users with adjustable parameters so as to fine-tune the noise reduction process according to specific preferences and requirements.
Visit EaseUS Noise Reducer now to use its multiple free features now!
Powered by Advanced AI
Follow these steps to use it to remove noise in your audio:
Step 1. Visit the website and select the "Noise Reducer" option.
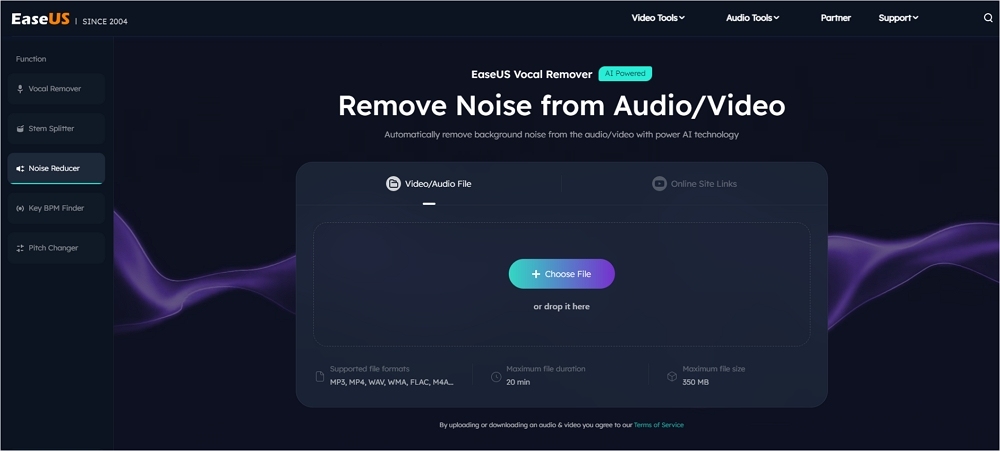
Step 2. Click "Choose File" or drag and drop the file in the area and wait for the AI analysis.
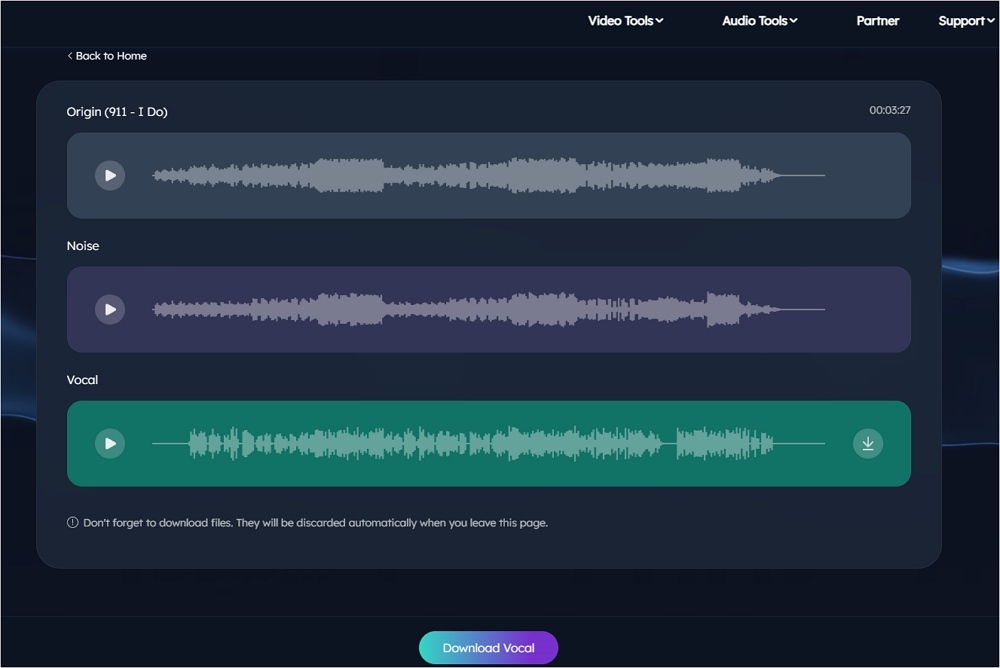
Step 3. Download the final work with noise removed.
Audacity
Audacity is a free and highly accessible audio editing program for Windows and Mac OS platforms. It offers multiple features such as the ability to record live audio and perform editing tasks. You can even visualize advanced audio analysis using the Spectrogram view mode. Audacity Noise Gate can remove background noise from audio or video events. Users can enhance the quality of their recordings. However, Audacity works with audio files only; you need to convert video into audio format.
Follow these steps to remove background noise using Audacity:
Step 1. Open Audacity.
Step 2. Go to the File menu.
Step 3. Select "Import" to load your desired audio into the program.
Step 4. Zoom in on the audio track or adjust the Track Size under the View menu.

Step 5. Select the "Noise Reduction" option from the Effect tab.
Step 6. Click on "Get Noise Profile" to allow Audacity to analyze the selected section and determine what to filter out.

Step 7. Select the entire audio track requiring noise reduction. Return to the Noise Reduction.
Step 8. To further refine the audio and address any remaining noise issues, go to the Effect menu and select "Amplify."
Step 9. Fine-tune the settings to mitigate any residual noise.
Step 10. Click "OK" to apply the adjustments.
Step 11. Export the clip from Audacity to your desired audio format.
To Conclude
Sony Vegas is a powerful audio editing tool that offers a range of methods to effectively remove background noise from recordings. Users can achieve remarkable results in enhancing audio clarity and quality. This article explored the effective ways to reduce background noise in Sony Vegas. We've provided step-by-step instructions for seamless implementation. However, for those seeking additional convenience and efficiency, we also recommend considering the EaseUS Noise Reducer. Its advanced capabilities allow users to achieve professional-grade results in their audio projects.
Powered by Advanced AI
FAQs on Removing Background Noise from Audio in Sony Vegas
While looking for ways to remove background noise from videos, you might have some confusion. Here are some insights to help you.
1. How do I remove the background noise in Sony Vegas?
Follow these steps to remove background noise in Sony Vegas:
Step 1. Click the Track FX button in the track header to open the Audio Track FX window.
Step 2. Select "Noise Gate" from the available effects.
Step 3. Adjust the threshold level slider to determine the volume level below which sounds have been eliminated.
Step 4. Fine-tune the Attack Time and Release Time sliders to balance noise reduction and preserve desired audio elements.
2. How do you change the background on Vegas Pro?
Step 1. Import your video and place it on the timeline.
Step 2. Add a background image or video on a track below the main video track.
Step 3. Use the Chroma Keyer effect to remove the green or blue background from the main video track, leaving only the subject.
Step 4. Adjust settings such as threshold and tolerance to refine the keying process.
Step 5. Create a new video track above your main video track.
Step 6. Draw a mask around the subject or area of the video you want to keep.
Step 7. Apply feathering or other effects to blend the masked area with the background.
Step 8. Import the new background image or video into your project.
Step 9. Place it on a track below the main video track.
Step 10. Adjust the size, position, and opacity of the background layer as needed to fit the video.
3. How do I remove background noise from a video?
One of the best free ways to remove background noise from a video is using tools like EaseUS Noise Reducer. Follow these steps to remove background noise from a video:
Step 1. Go to the EaseUS Noise Reducer website.
Step 2. Select the "Noise Remover" feature.
Step 3. Drag and drop the video file. The app will automatically process the video.
Step 4. Preview the created audio.
Step 5. Download the refined video.
Share this article with your friends and family to help them discover the best ways to refine videos!