-
![]()
Sofia Albert
Sofia has been involved with tech ever since she joined the EaseUS editor team in March 2011 and now she is a senior website editor. She is good at solving various issues, such as video downloading and recording.…Read full bio -
![]()
Alin
Alin is a sophisticated editor for EaseUS in tech blog writing. She is proficient in writing articles related to screen recording, voice changing, and PDF file editing. She also wrote blogs about data recovery, disk partitioning, data backup, etc.…Read full bio -
Jean has been working as a professional website editor for quite a long time. Her articles focus on topics of computer backup, data security tips, data recovery, and disk partitioning. Also, she writes many guides and tutorials on PC hardware & software troubleshooting. She keeps two lovely parrots and likes making vlogs of pets. With experience in video recording and video editing, she starts writing blogs on multimedia topics now.…Read full bio
-
![]()
Gorilla
Gorilla joined EaseUS in 2022. As a smartphone lover, she stays on top of Android unlocking skills and iOS troubleshooting tips. In addition, she also devotes herself to data recovery and transfer issues.…Read full bio -
![]()
Rel
Rel has always maintained a strong curiosity about the computer field and is committed to the research of the most efficient and practical computer problem solutions.…Read full bio -
![]()
Dawn Tang
Dawn Tang is a seasoned professional with a year-long record of crafting informative Backup & Recovery articles. Currently, she's channeling her expertise into the world of video editing software, embodying adaptability and a passion for mastering new digital domains.…Read full bio -
![]()
Sasha
Sasha is a girl who enjoys researching various electronic products and is dedicated to helping readers solve a wide range of technology-related issues. On EaseUS, she excels at providing readers with concise solutions in audio and video editing.…Read full bio
Content
Sasha
Updated On 03/10/2025
0 Views |
0 min read
Audio quality plays a critical role in enhancing viewer engagement. High-quality audio ensures clarity, while poor audio quality can be distracting. You can achieve excellent audio quality using specialized software tools.
Audacity is a popular tool to achieve high-quality audio. The free, open-source audio editor offers multiple features to enhance audio files. Its Equalizer tool enables users to adjust the balance of frequency components of an audio file. This article guides you through the process of how to use the Equalizer in Audacity. We'll provide detailed steps to help you improve sound quality on PC. Moreover, here we'll suggest the best online tool to achieve pristine audio quality.
About Audacity's Equalizer
Audio quality is a primary consideration when creating professional recordings. Audacity's Audio Equalizer feature allows users to manipulate sound frequencies. It can enhance or diminish specific ranges to create a balanced and polished audio output. You can adjust the volume of various frequencies and remove vocals from a song in Audacity. The Filter Curve EQ helps you increase or decrease the frequencies. Users can enhance the overall sound quality to create clearer and more pleasant audio. This tool is particularly useful for refining voice recordings. You can clean up audio in Audacity and emphasize certain aspects of the voice.
How to Use Equalizer in Audacity
Follow these steps to use Audacity's Equalizer:
Step 1. Open Audacity. Select "File"> "Open" and choose the file from your computer. Go to the "Effect" menu and select "Filter Curve EQ." It will open the Filter Curve EQ tool.

Step 2. Click the "Flatten" button at the bottom to reset the curve.

Step 3. Human voices typically do not produce frequencies lower than 100Hz. Follow these steps to eliminate these inaudible frequencies and reduce unwanted noise:
- Create a dot just above the 100Hz mark on the curve.
- Create another dot slightly to the left of the first dot.

- Drag the second dot downward until it reaches the lowest point on the curve. This action rolls off the base frequencies, resulting in a cleaner audio output.
Step 4. Treble frequencies above 6,100Hz contribute to the clarity and crispness of a recording. To enhance these frequencies:
- Add a dot above the 6,100Hz mark on the curve.

- Add another dot slightly to the right of the first dot.
- Drag the second dot upward by up to 6 dB. This will increase the volume of the treble frequencies.

Step 5. The Filter Curve EQ allows for precise adjustments across the frequency spectrum. To further polish your audio:
- Add and manipulate more points along the flat line to adjust the curve to suit your preferences.
- Consider rolling off more base frequencies and notching up low-end frequencies. It reduces boxy mid-range frequencies and enhances the high frequencies as needed.

Step 6. Preview the audio to ensure the changes produce the desired effect. Click "OK" to apply the effects to your audio file.
Common Questions/Suggestions
Some users may face issues in using Audacity. Here are some common questions and their solutions related to Audacity.
1. Audacity Equalization Missing
Audacity offers multiple other tools and effects for advanced audio editing. However, sometimes, users encounter issues where the equalization effect appears to be missing from the software. This can be a frustrating experience if you are relying on this feature to enhance your audio projects. The Equalization effect is essential for manipulating sound frequencies to improve audio quality.
Possible Reasons for Missing Equalization Effect:
Several reasons might explain why this feature is missing:
- 1. Outdated Software Version: The Equalization effect has been renamed and updated in recent versions of Audacity. The effect may not be present or may appear under a different name in an older version of the software.
- 2. Improper Installation: Some features like the Equalization effect might be missing if Audacity was not installed correctly.
- 3. Missing Plugins: The Equalization effect relies on specific plugins that might not be correctly installed or activated in your Audacity setup.
- 4. User Preferences and Settings: User preferences and settings can hide or disable certain effects within the software.
How to Resolve the Missing Equalization Effect
Step 1. Install Latest Version of Audacity
1️⃣Open Audacity and go to the "Help" menu.
2️⃣Select "About Audacity" to check the version number.
3️⃣Download the latest version.

Step 2. Check and Enable Plugins
1️⃣Open "Audacity" and select "Edit" menu.
2️⃣Select "Preferences" and click on "Effects".
3️⃣Ensure that all relevant plugins are "enabled."

Step 3. Adjust User Settings
1️⃣Go to the "View" menu in Audacity.
2️⃣Select "Toolbars" and ensure all toolbars are visible.
3️⃣In the "Effect" menu, check if the "Filter Curve EQ" is listed. Reset Audacity's settings to the default if they are not listed.

Step 4: Restart Audacity
1️⃣Close Audacity and restart your computer.
2️⃣Reopen Audacity to ensure the changes take effect.
2. Best Audacity EQ for Voiceover
Voiceovers are vital in many audio projects. The clarity and quality of the voiceover can impact the listener's experience.
Voiceovers are used in many audio projects. Equalizer helps enhance voiceovers by adjusting the frequency components of the audio. Users can boost or cut specific frequency ranges. Use the EQ properly to make a voice sound more professional. The Audacity Equalizer effect plugin offers settings to enhance voice recording. It's about understanding which frequencies need adjustment to achieve the desired sound. Boosting lower frequencies can add warmth, and you can improve clarity by enhancing higher frequencies.
Suggestions for using Equalizer for Voiceovers
1. Understand the Basics: It's crucial to understand the basics of frequency ranges and how they affect the sound. Frequencies below 100 Hz often contain rumble and are not needed for voiceovers. Frequencies above 6,000 Hz add clarity and presence.
2. Use High Pass Filters: Applying a high pass filter to cut everything below 80 Hz can remove low-end rumble and noise.
3. Balance Frequency Adjustments: Avoid excessive boosting or cutting of frequencies. Extreme adjustments can make the voice sound unnatural or introduce distortion.
4. Experiment and Listen: Each voice is unique, so it's important to experiment with different EQ settings.
Steps to adjust voiceovers with Audacity:
Step 1. Start Audacity and load the voiceover file you wish to edit.
Step 2. Go to the "Effect" menu and select "Filter Curve EQ."

Step 3. Click the "Flatten" button to start with a flat EQ curve.
Step 4. Create a dot at 80 Hz and another slightly to the left. Drag the second dot down to the lowest point on the curve. This will cut off frequencies below 80 Hz.

Step 5. Make necessary adjustments:
- To enhance warmth: Add a dot around 180-200 Hz and boost it by 3-5 dB.
- To Improve Clarity: Add a dot around 3,000 Hz and boost by 4-6 dB.
- To reduce Muddy Frequencies: Add a dot around 300-400 Hz and reduce slightly.
- To enhance Treble Frequencies: Add a dot above 6,000 Hz and another to the right. Boost this range by up to 6 dB to highlight treble frequencies.
Step 6. Add and adjust more points on the EQ curve as needed.
Step 7. Click "OK" to apply the effect to your voiceover.
Bonus: Quick Way to Enhance Audio Quality
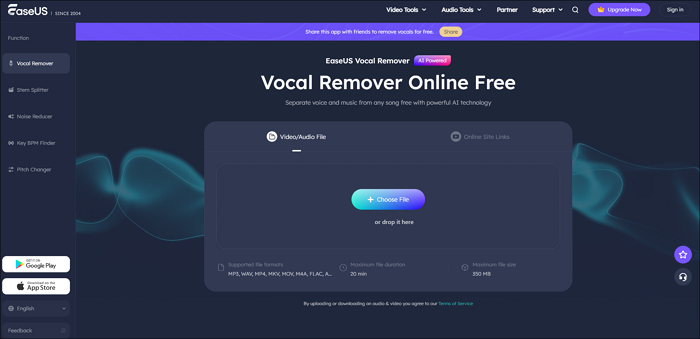
EaseUS Online Vocal Remover is a powerful tool to enhance the quality of your audios. This AI-powered tool simplifies the process of adjusting pitch and frequencies. You can easily equalize audio files and remove echo from audio with just a single click. It also supports removing of vocals to create karaoke tracks or instrumental versions of songs. The vocal remover is highly versatile and supports various audio and video file formats. The AI algorithm automatically recognizes and enhances your audio. This tool is also known for its efficient noise removal without losing quality. It can also separate other audio elements without compromising the quality.
- Precise Frequency Adjustment: It utilizes advanced AI algorithms to automatically adjust the pitch and frequencies of any audio or video track. It provides precise and efficient results without manual effort.
- Supports Multiple File Formats: The software is compatible with multiple audio and video formats. Users can edit multiple file types and remove vocals from background noise.
- Built-In Audio Player: It includes a built-in player for real-time preview of the extracted audio. Users can instantly listen to and assess the quality of the audio.
- Online URL Support: The software allows users to paste URLs from YouTube or SoundCloud to edit audio directly from online content. It simplifies the process of working with online media.
Visit EaseUS Online Vocal Remover website to use its multiple audio enhancement tools!
Powered by Advanced AI
The Bottom Line
The Equalizer effect in Audacity is an essential component for refining your audio projects. Users can adjust and balance frequencies to achieve a polished sound. This guide explored how to use the Equalizer in Audacity. We've discussed detailed steps on using the tool. If you're looking for a tool that can simplify the process of enhancing your tracks, EaseUS Online Vocal Remover is an excellent choice. Its AI-powered capabilities and user-friendly interface provide a seamless experience for improving your audio projects.
FAQs on How to Use Equalizer in Audacity
Using the Equalizer in Audacity can improve your audio quality. Here are some insights to help you use the Equalizer in Audacity.
1. How to Equalize Audio Levels in Audacity?
Follow these steps to equalize audio levels in Audacity:
Step 1. Open Audacity on your computer.
Step 2. Go to "File"> "Import"> "Audio." Select the file to edit.
Step 3. Highlight the portion of the track to equalize.
Step 4. Go to "Effect"> "Equalization." This will open the equalizer interface. Use the sliders or draw curves to adjust the frequency bands.
Step 5. Boost or reduce frequencies to enhance the overall audio quality.
Step 6. Click "Preview" to listen to the changes in real-time. Adjust the frequencies as needed.
Step 7. Click "OK" to apply the changes. Click on "File"> "Export" and choose your preferred format.
2. How to Use an Equalizer for Beginners?
Here are the tips to use Equalizer for beginners:
1. Understand Frequency Bands:
- Low Frequencies of 20 Hz to 250 Hz can control bass and lower tones.
- Mid Frequencies of 250 Hz to 4 kHz affect vocals and instruments.
- High Frequencies of 4 kHz to 20 kHz can manage treble and higher tones.
2. Make small adjustments to each frequency band.
3. Use the Preview button to listen to your changes before applying them.
4. Fine-tune the frequencies until you achieve the desired sound.
3. How Do I Set My Equalizer to Get the Best Sound?
Here are the steps to set the Equalizer in Audacity to get the best sound:
Step 1. Open Audacity and import the audio file and region you want to edit.
Step 2. Go to the "Effect" menu and select "Graphic EQ."
Step 3. Adjust Frequencies:
- Bass: Boost low frequencies (20 Hz to 250 Hz) for warmth.
- Midrange: Adjust mid frequencies (250 Hz to 4 kHz) for clarity.
- Treble: Boost high frequencies (4 kHz to 20 kHz) for brightness.
- Step 4. Set a high-pass filter below 80 Hz to remove unwanted low-end rumble.
Step 5. Play back the audio and make adjustments to the EQ settings until the desired sound is achieved.
Step 6. Click "OK" to apply the equalization effect to your audio track.
Share this article with your friends to help them enhance their audio projects easily!