-
![]()
Joey Albert
Joey has been involved with tech ever since she joined the EaseUS editor team in March 2011 and now she is a senior website editor. She is good at solving various issues, such as video downloading and recording.…Read full bio -
![]()
Alin
Alin is a sophisticated editor for EaseUS in tech blog writing. She is proficient in writing articles related to screen recording, voice changing, and PDF file editing. She also wrote blogs about data recovery, disk partitioning, data backup, etc.…Read full bio -
Jean has been working as a professional website editor for quite a long time. Her articles focus on topics of computer backup, data security tips, data recovery, and disk partitioning. Also, she writes many guides and tutorials on PC hardware & software troubleshooting. She keeps two lovely parrots and likes making vlogs of pets. With experience in video recording and video editing, she starts writing blogs on multimedia topics now.…Read full bio
-
![]()
Gorilla
Gorilla joined EaseUS in 2022. As a smartphone lover, she stays on top of Android unlocking skills and iOS troubleshooting tips. In addition, she also devotes herself to data recovery and transfer issues.…Read full bio -
![]()
Rel
Rel has always maintained a strong curiosity about the computer field and is committed to the research of the most efficient and practical computer problem solutions.…Read full bio -
![]()
Dawn Tang
Dawn Tang is a seasoned professional with a year-long record of crafting informative Backup & Recovery articles. Currently, she's channeling her expertise into the world of video editing software, embodying adaptability and a passion for mastering new digital domains.…Read full bio -
![]()
Sasha
Sasha is a girl who enjoys researching various electronic products and is dedicated to helping readers solve a wide range of technology-related issues. On EaseUS, she excels at providing readers with concise solutions in audio and video editing.…Read full bio
Page Table of Contents
Jane Zhou
Updated on Jun 16, 2026
0 Views |
0 min read
There are several instances where you may need a video compressor, be it lack of storage space or inability to upload videos due to file size. For many people, the iMovie can serve the purpose of video compression. However, this is not the only available tool for video compression. Other tools such as EaseUS Video Converter, VLC, and HandBrake can compress large videos. This article will teach you how to use each tool for video compression in easy steps.
PAGE CONTENT:
How To Compress Videos With iMovie
iMovie is a simple video editor developed by Apple, which means this tool is only available on iOS devices. In addition to compressing video, iMovie also reduces the size of your videos while retaining good quality, splits long videos into clips, or cuts out unwanted parts of the video. If you want to know how it works, here are the steps.
Step 1. Check video size
Before you start to compress a video, you should ensure that you check the original size of the video file.
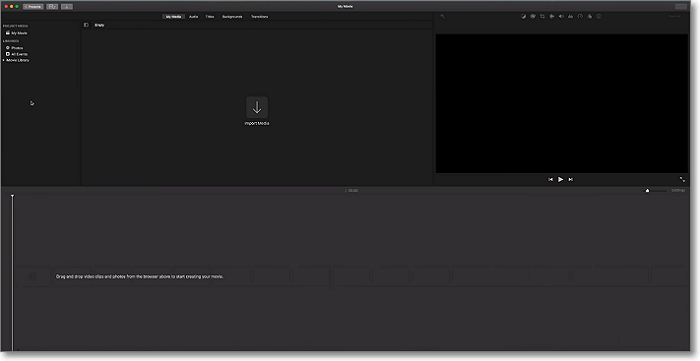
Step 2. Open iMovie and import media
To begin the compression process, open iMovie on your device and import the video you intend to compress. To do this, you need to select the Import media button, double-click on the video to be compressed, and drag it to the editing area.
Step 3. Cut or split the video to reduce the file size (optional)
This step is optional, and you may skip it if you wish to keep your video whole. You can use the cut or split editing features to reduce the size of the video. The cut feature removes parts of the video you do not want, while split lets you divide the video into clips.
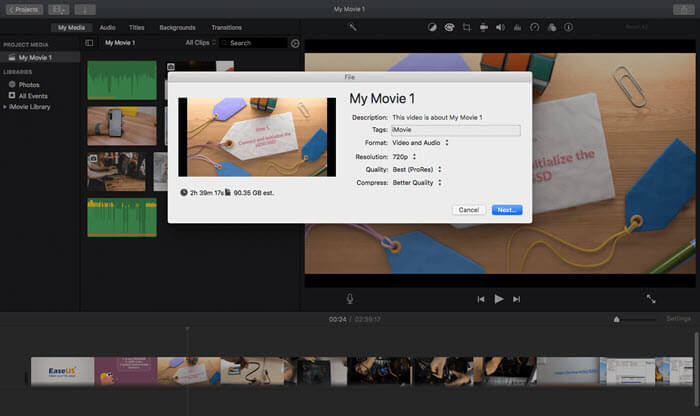
Step 4. Choose the desired compression option
Click on "Share," and you can find the compression option on your menu bar. Here you can select the resolution, quality, and type of compression you desire. It is important to note that the quality of your video will be affected by the rate of compression, a highly compressed video will result in poor quality, while a video with good quality may not be compressed to your desired size.
Step 5. Save the compressed file
The next step is to save your video. Click on "Next" you may choose to rename your file here and then hit the "Save" button. The video will be exported to your device.
If you're not satisfied after checking the size and quality of your exported video, you may consider other compression tools as an alternative to iMovie.
How To Compress Videos With EaseUS Video Converter
EaseUS Video Converter is a tool that allows you to reduce the size of your video file and change the format after compression. This tool is easy to use, especially for beginners, and it supports many video formats, such as MP4, MOV, M4V, and audio formats, such as MP3, M4A, MAV, M4R, AIFF, etc. With the EaseUS Video Converter, you can convert any video to MP4 or compress them to a smaller size while retaining the best possible quality.
There is no doubt that both EaseUS Video Converter and iMovie are good tools when it comes to video compression. However, EaseUS Video Converter has some features which beat iMovie. Here are some reasons why you should choose EaseUS Video Converter as your go-to editing, conversion, and compression tool.
- User-friendly features
- Available to all devices
- Free trial period on all devices
- High-speed conversion
- Lossless conversion
- Batch conversion
To compress any video with EaseUS Video Converter:
Step 1. Download and launch EaseUS Video Converter on your computer. Select "Video Compressor" from the left side pannel.
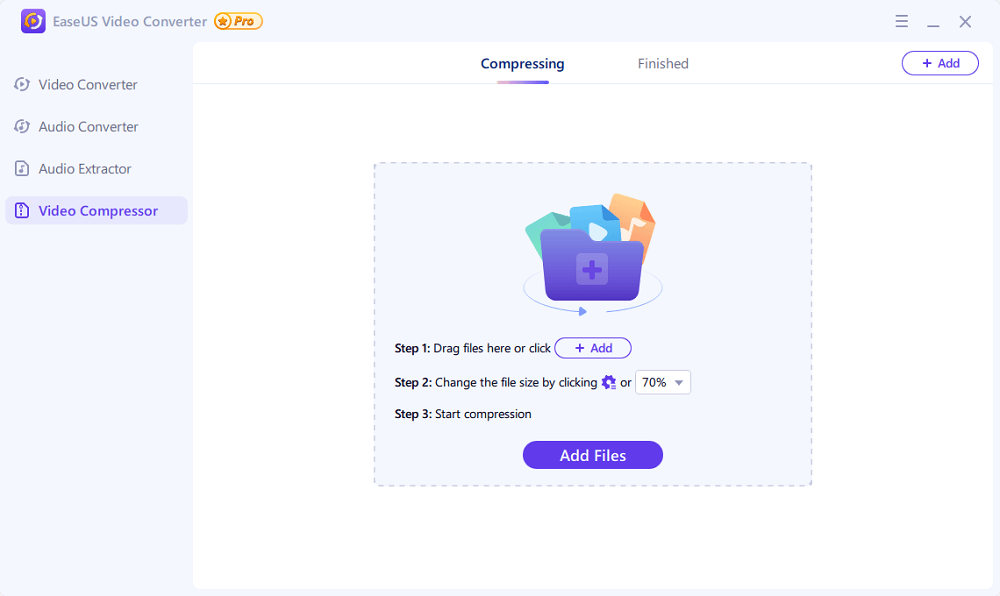
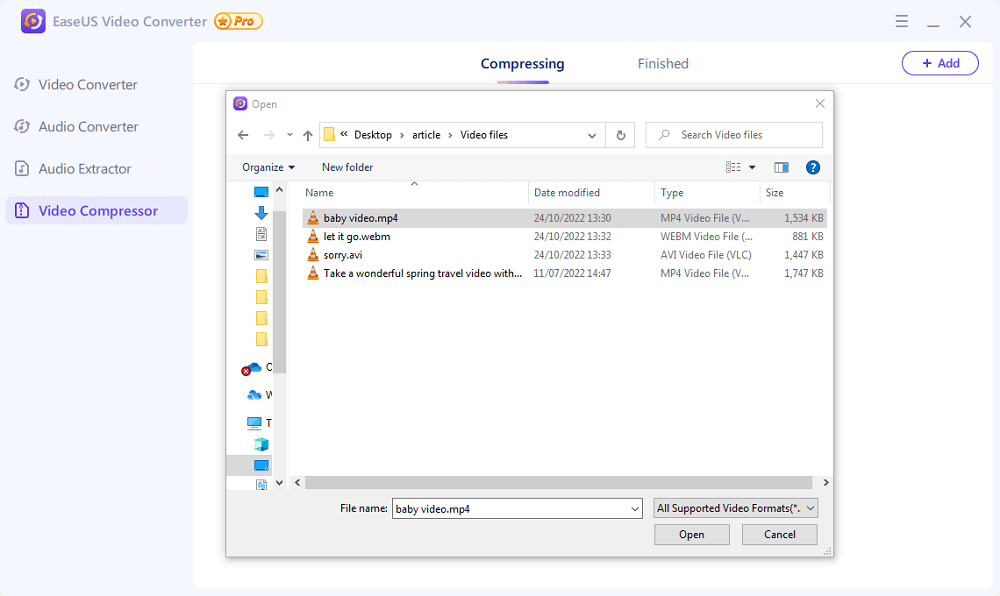
Step 2. Click "Choose Files" to select video files you wish to compress. You can choose any video format like MP4, AVI, MKV, WMV, MOV, WebM, and more. Then, import the video by clicking "Open."
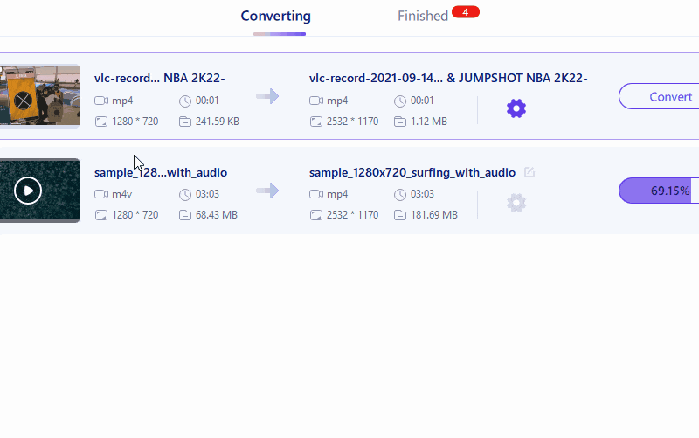
Step 3. Click the gear icon next to your video information to customize your video size, targeted output format, bitrate, resolution, and more. Then, you can click "Preview" to preview your video. Once done, click "OK," and then click "Compress" or "Compress All" to start compressing.

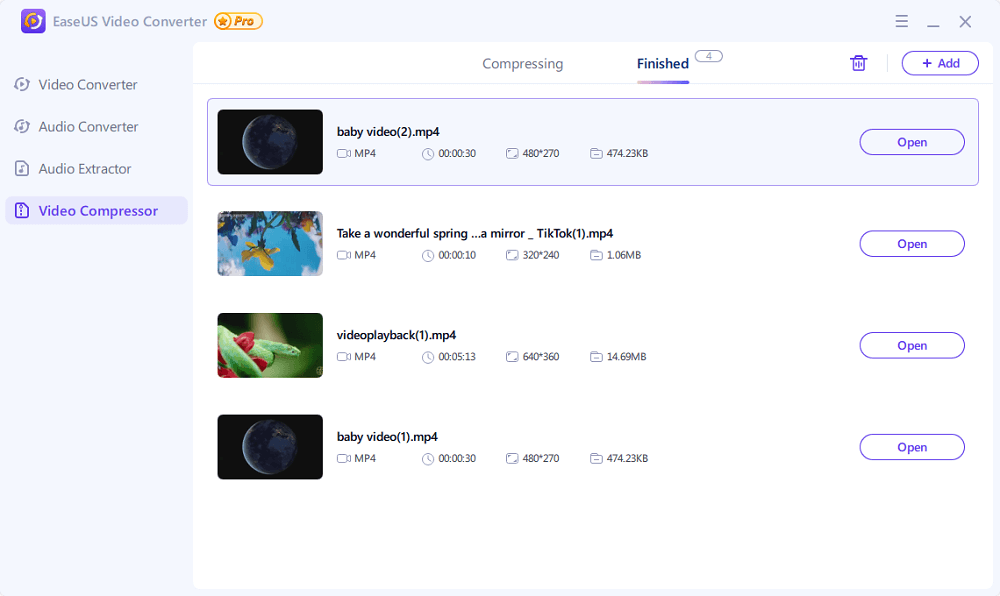
Step 4. Once the process is completed, you can go to the "Finished" tab to check the compressed videos.
How To Compress Videos With VLC
You may be surprised to find VLC listed here, as many only know it as a media tool. However, VLC can also be used to compress video size to save space, upload on social media or share the video with other people. Your type of device does not hinder you from using VLC, as it is available for several devices.
To help you know how to compress video by using VLC, steps are provided below:
Step 1. Download and install VLC
You need to download the VLC app to your device before you can make use of any of its features. You can visit the official page to download this application since VLC is available on multiple devices. Once you have downloaded VLC, double-click the setup file and give the program the necessary permissions to install it.
Step 2. Import Video
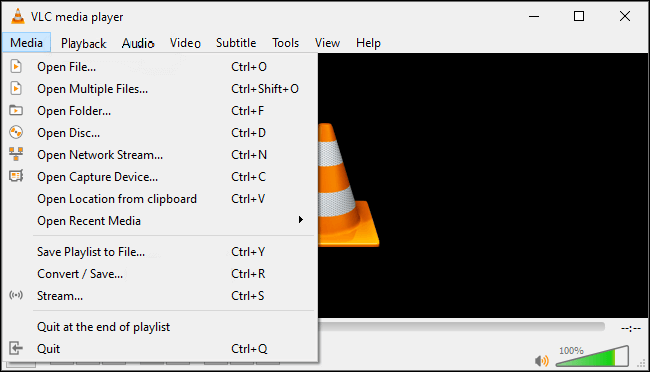
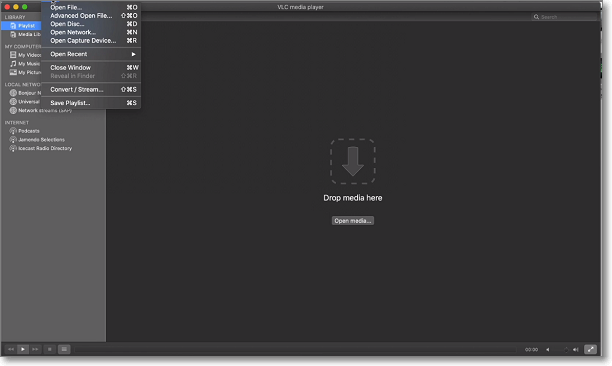
Once the installation is complete, launch the app. You can now begin to compress your video. Click on "Media" and select the "Convert option" after doing this, you'll need to click on "Add" to choose and import the video you want to compress then click on "Convert" again.
Step 3. Compress
To compress your video, you'll need to select your desired output type and compression settings. Click on "Browse" to choose a location where your file will be saved after compression, and then click on "Start". This will begin the compressing process. While this is happening, do not close the window to avoid corrupting the output file.
How To Compress Videos With HandBrake
HandBrake is a free compression tool available on multiple platforms, such as Linux, Mac, and Windows. It can also convert a video from almost any format to various widely supported and modern codecs. With the application, you can reduce the size of your videos in no time. You can shrink the size of your videos using HandBrake with the following steps.

You should follow the steps below to compress the video with Handbrake:
Step 1. Download and install Handbrake
To use HandBrake, you need to have the application. Therefore you should visit the official website and download the application, and the next step is to install it as soon as the download is complete.
Step 2. Launch the application and load the file
Load the app once you're done with installation. Click on "Source Selection" on the left side of the window and select "File". This will allow you to view your files, select the video you want to compress, and click "Open".
Step 3. Choose a location for the video and give it a name
Click on "Browse" on the right side of the window to select a destination where you wish your video to be saved. Then you can proceed to give the file a name. Give it a name that will differentiate it from the original video file and click on "Save".
Step 4. Customize the video features to compress
You can then proceed to customize features such as output format, profile option, bitrate, and so on. Tap "Start Encode" and wait for the compression to finish. HandBrake will notify you when your video has been successfully compressed. If you like the settings of this video compression, you can save it as a preset by clicking "the + next" to the Preset Drawers button. Give it a name and description, then save it.
Conclusion
Now that you have learned how to compress videos with iMovie, EaseUS Video Converter, VLC, and HandBrake, dealing with videos that take up space on your device and are too big to be uploaded will no longer be a problem. You can simply download EaseUS Video Converter for a straightforward compression of those large video files.
FAQ
1. How do I compress an iMovie file on iPhone?
You can compress an iMovie file by using the iMovie editing and compressing tool available on your iOS device. You can also download and install Movavi Video Converter to compress your files since it has more features and is beginner friendly.
2. What does it mean to compress an iMovie?
Compressing an iMovie means decreasing the size and, as a result, the quality of the file. You can do this by shortening the length of the video or using compressor tools available to you.
3. Why is the iMovie file so large?
Exporting a video that has a higher bitrate than the version you imported initially can cause the file size to be more significant. Although this might give the file a higher resolution, it defeats the purpose of compression. Movavi Video Converter allows you to shrink the size of your file while retaining the best possible quality.