EaseUS Video Editor
- System Requirements
- Activation
- Editing Interface
- Edit Video
- Snapping
- Trim Video Clips
- Rotate or Flip a Video Clip
- Crop Video Clips
- Join Videos
- Copy and Paste Video Clips
- Enhance Video Clips
- Change Video Playback Speed
- Zoom in and out Timeline
- Add Watermark/Logo to the Video
- Background Music Addition
- Split Audio
- Adjust Audio
- Mute Video Clip
- Extract Audio from Video
- Replace the Original Audio of the Video
- Trim Audio Clips
- Fade Audio in or out
- Adjust Audio Speed
- Noise Reduction
- Add image to Video Track
- Change Image Duration
- Change the Position of an Image/li>
- Rotate or Flip an Image
- Adjust Image Color
- Add Text Effect
- Edit Text Effects
- Remove a Text
- AI Subtitles
- Filter and Effects
- Remove Filter and Effects
- Find Filter and Effects
- Customize Filters
- Stickers and Transitions
- Export as a Video File
- Export with an Audio File
Welcome
Thank you for choosing EaseUS Video Editor.
Whether you have hundreds of homemade videos or photos, our Video Editor enables you to produce stylish videos with cinema-quality effects. Regardless of your skill level, creating memorable videos has never been easier. Select your video clips, enhance them with titles, text, filters, effects, and templates, and watch your video come to life. For a more comprehensive understanding, please refer to our manual.
Get Started
This section provides fundamental information on how to use EaseUS Video Editor, aimed at helping you gain an overview before getting started.
Hardware Requirements
Ensure your device meets the following prerequisites:
• Processor: 500 MHz or faster
• RAM: A minimum of 1GB, 2GB for Windows 8/8.1/10
• Hard disk space: At least 1GB
• CD-R/RW, DVD-R/RW, DVD+R/RW or DVD+R DL drive
• Compatible keyboard, mouse, and pointing devices
System Requirements
Ensure your operating system is one of the following:
• Windows® 7/8/8.1/10/11
Activation
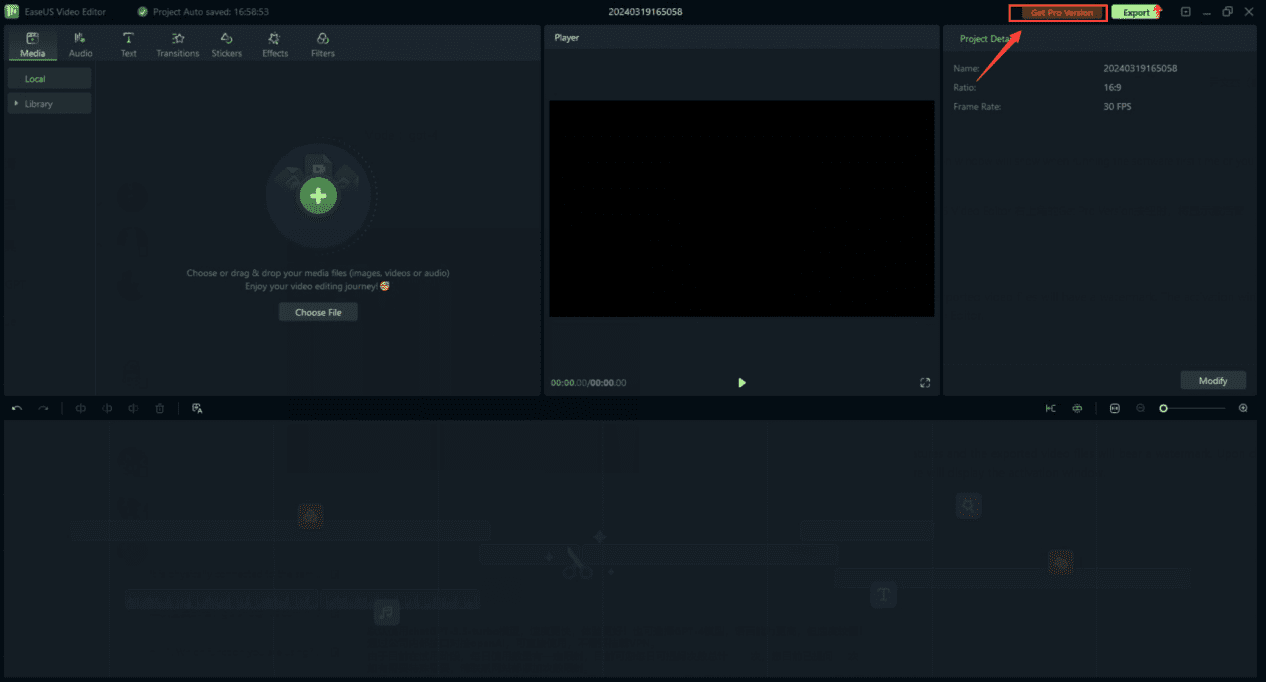
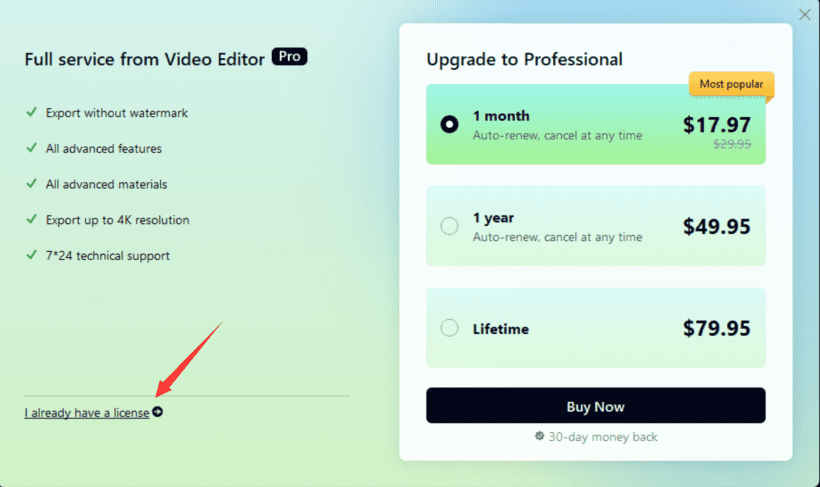
The EaseUS Video Editor trial version is readily usable but does not include Pro version features, and exported videos will carry a watermark. To activate, click 'Get Pro Version' in the top right corner, and the software will display the activation window.
Click 'I already have a license' to input your license code.
Navigate Video Editor
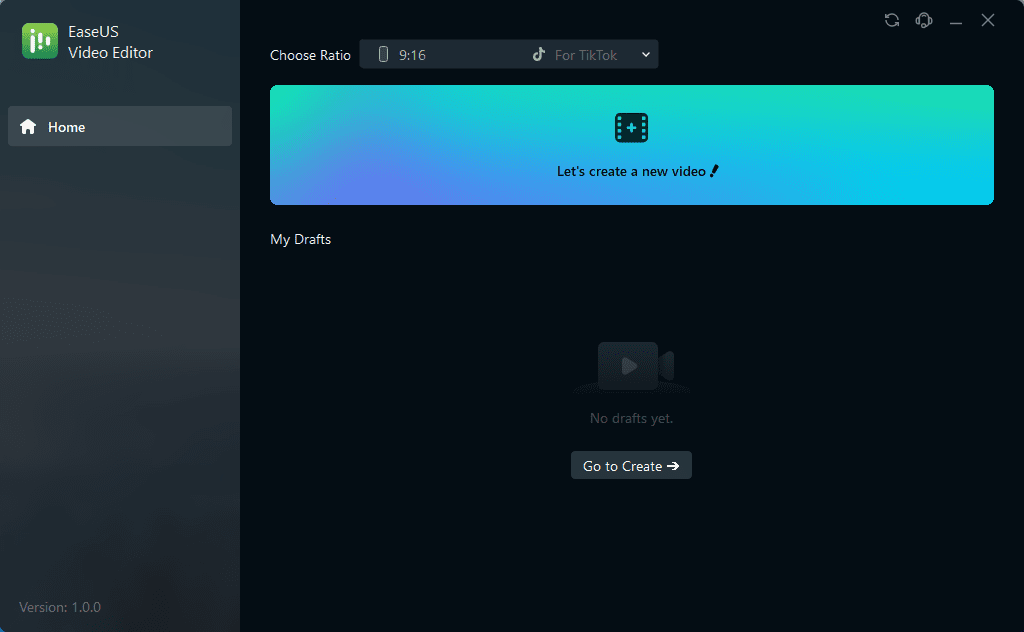
To start, double-click the software icon. This will open the 'get-started' window, where you can create a new video with a specific aspect ratio for your platform or open a saved draft.
Editing Interface
Upon entry, you will be greeted by the editing interface.
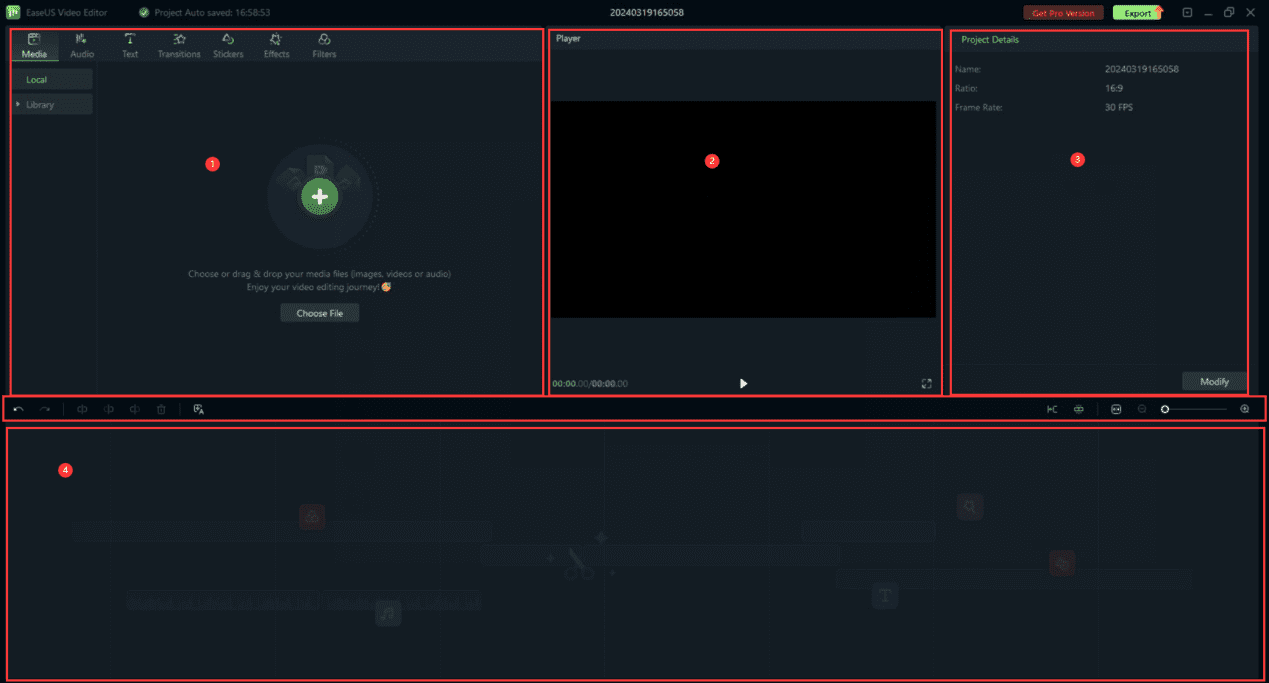
Media Library: Stores all your media, including video, photos, and audio. It also hosts text effects, transition effects, stickers, special effects, filters, and other assets for your projects
Preview Window: Displays the video currently placed in the Timeline.
Properties Panel: A dedicated space for modifying the attributes of selected items, such as position, rotation, scale, and flip, providing control and precision in fine-tuning each item's appearance and arrangement.
Toolbar: Houses diverse editing tools, including functionalities to cut, crop, zoom in and out of the timeline, and an AI-powered speech-to-text feature.
Timeline: The area where you assemble your video project's media and effects.
Basic Editing
Once your media files, such as videos and images, are uploaded to the Media Library, you can begin the editing process. This guide will instruct you on how to arrange clips on your timeline, hone your footage, eliminate unnecessary segments, and more.
Edit Video
Selecting Clips in the Media Library
To choose a single media file: click on its thumbnail.
To choose multiple media files: hold down [Ctrl] and click the thumbnails of the desired media.
To choose a sequence of media files: click the first thumbnail in the sequence, hold down [Shift], then click the last thumbnail in the sequence.
Deleting Media from the Media Library
In the Media Library, right-click on the clip you wish to remove in the Media Library, then select Delete.
Note: Deleting a media file from the Media Library only removes it from the Video Editor, not from your computer or storage device.
Adding Videos and Other Media to the Timeline
Here are two ways to add media to the timeline:
Method 1: Click on the lower right + icon of the media thumbnail in the Media Library.
Method 2: Drag and drop the selected media into your timeline.
Deleting Clips from Timeline
To delete a single media file from your timeline, right-click on the media in your timeline and select Delete, select the clip, and hit the Delete icon in the toolbar, or press the Delete key on your keyboard.
To delete multiple media files, press and hold [Ctrl], then select the target files. Release [Ctrl] and delete the items using the delete icon, the delete key on your keyboard, or by right-clicking and selecting delete.
Snapping
Removing media from the timeline may leave a gap. To remove media and close this gap, use the snapping feature.
Toggle the snapping feature on and off by clicking the snapping icon on the toolbar. When the icon is green, the feature is active. This feature is enabled by default.
Main Track Snapping: This refers to the automatic connecting of clips on the main track.
Timeline Snapping: This refers to the connecting of two clips on the same track when they are positioned closely together.
Trim Video Clips
To remove a segment from a video clip, drag the play head to the start and end points of the undesired section and press the scissors icon to split the clip. Then select the unwanted section and press the delete icon to remove it.
Rotate or Flip a Video Clip
To rotate or flip a clip:
1. Left-click the clip in the Timeline.
2. In the Properties Panel on the top right, go to the Video tag.
3. To rotate the clip, drag the rotate slider right or enter a numerical value in the rotate section.
4. In the Flip section, click the Flip Horizontal icon to reverse the clip horizontally, or click the Flip Vertical icon to flip the clip vertically.
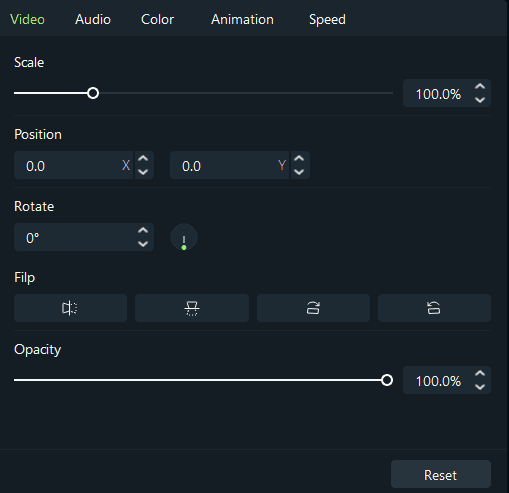
Click Reset to undo changes.
Crop Video Clips
To crop and zoom into parts of your video clips:
1. Left-click on the clip in the timeline
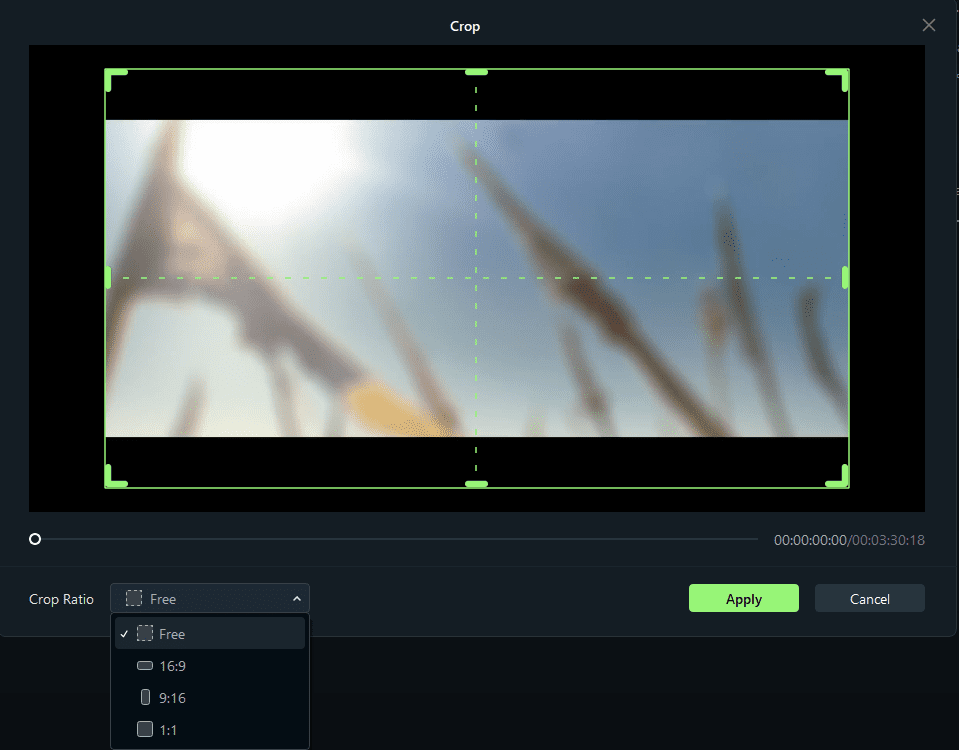
2. Select the Crop option from the toolbar.
In the window that appears, adjust the rectangle to surround the area you want to crop. You can also choose from preset dimensions: Free, 1:1, 16:9 or 9:16.
Join Videos
The join feature allows you to combine several video clips into a single clip. To join videos, arrange them in the order desired in the Timeline and export them as a single video.
Copy and Paste Video Clip
When copying and pasting clips in the timeline, the original spacing is maintained. You can paste copies of clips at the end of your video or insert them at the playhead's location.
1. Select one or more clips in the sequence, right-click, and select Copy.
2. Position the playhead at the point where you want to paste the copied clips.
3. Right-click and select 'Paste'.
Enhance Video Clip
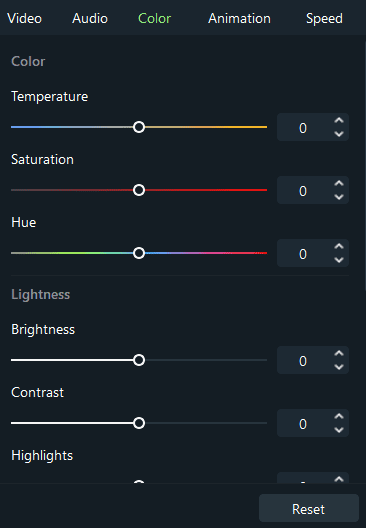
Enhance your video clips by tweaking saturation, hue, and contrast, adjusting highlights and shadows, managing exposure levels, sharpening for detail, and adding particles for extra depth.
Left-click the target clip in the timeline and select the Color menu in the Properties Panel on the top right. Use the sliders to adjust color temperature, tint, contrast, saturation, brightness, etc. You can also enter numerical values for precise adjustments. Watch the Preview Window to see the effect of your changes.
Change Video Playback Speed
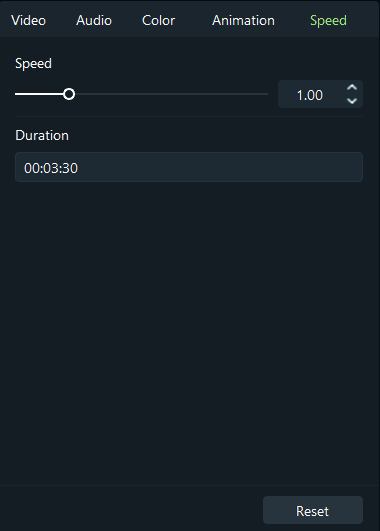
Select the Speed option in the Properties Panel after left-clicking on your clip in the timeline. Adjust the speed slider or enter a precise speed in the speed field. You can also change the speed by modifying the video duration. The maximum speed is 100x faster and the slowest is 0.01x slower.
Zoom in and out Timeline
To zoom in or out of your timeline:
Find the Zoom slider in the top right corner of the timeline. Drag it forward to zoom in and backward to zoom out.
Click on the - icon in the toolbar to zoom in, or the + icon to zoom out.
Click on the Auto Resize icon to automatically adjust the zoom to fit your entire timeline.
Use the shortcut Ctrl + scroll up to zoom in and Ctrl + scroll down to zoom out.
Add Watermark/Logo to the Video
Import a video clip and a watermark/logo image to the Media Library, then drag and drop the video clip to a video track and the watermark/logo to a track above it.
You can move the watermark/logo image in the Preview Window to the desired position. Adjust the size of the watermark or logo by dragging the small circles at its edges in the Preview window.
To adjust the opacity of your watermark or logo, left-click on the image in the timeline, then drag the opacity slider in the Properties Panel or enter a precise value to adjust the opacity.
Editing Audio
Background Music Addition
The ambiance of your video can be significantly altered by adding background music. Video Editor provides a royalty-free music library you can utilize, or you can import your music.
Here are a few methods to add background music to your videos.
Note: For personal, non-commercial use only, you may use the music and sound effects found within Video Editor.
Import Music from your Computer: Choose and incorporate an audio file that's stored on your PC into Video Editor.
Click the "Add" button in the Media Library panel to search for audio files on your computer. Locate the song or other audio file you want, select it, and import it into the Media Library. You can also employ the drag-and-drop method for audio files in the Media Library. From there, drag and drop your audio into an Audio Track on the timeline.
Using Music from Video Editor: Opt for a song from VideoEditor’s royalty-free audio library and use it free of charge.
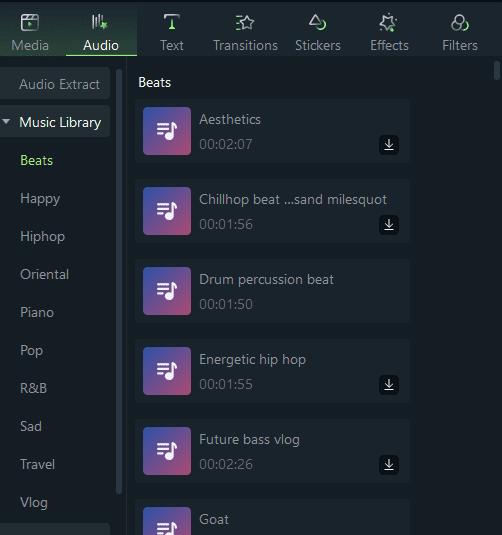
To add music from the library to your video, simply select a song from the Library, and drag it into the Timeline.
Split Audio
Navigate the playhead to the point in your audio clip where you wish to split it on the timeline. Then, right-click on the clip and select "Split," or click the "Split" button in the toolbar above the timeline.
Adjust Audio
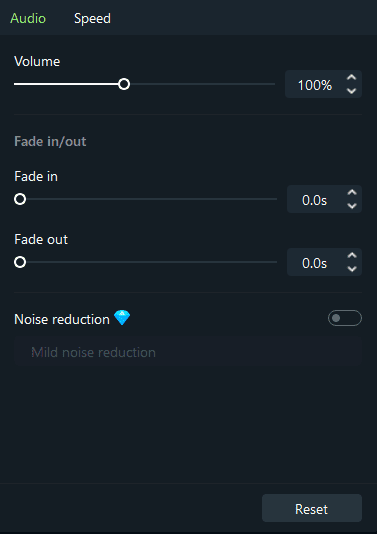
To adjust your audio, left-click on the music in the timeline, and you can modify the music volume in the Properties Panel. You can also implement fade-in or fade-out effects and adjust the duration to determine their length.
An additional tool in this panel is Noise reduction, which can eliminate background noise from your audio clips. Listen to it when you are finished, and if the results do not meet your expectations, click Reset to begin anew.
Mute Video Clip
To mute the audio in a video clip, simply set the Volume to 0%.
Extract Audio from Video
You can extract the audio from a video clip without modifying the original clip. To do this, right-click on the clip and select "Extract Audio." The audio will be separated from the video and automatically placed in an audio track.
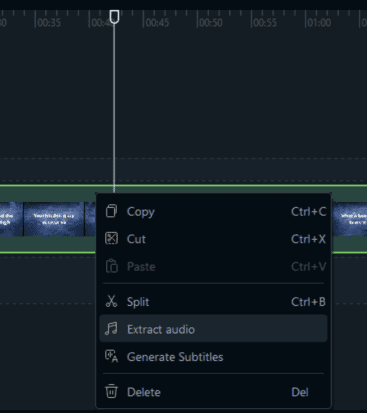
The extracted audio clip will automatically be placed in the audio track, and you can choose to delete it or edit it for further use.
Replace the Original Audio of the Video
To substitute the original audio with a new audio clip in a video, follow these steps:
After adding the video clip to the timeline, right-click on it and select "Extract Audio." The audio will be separated from the video clip and placed in an audio track.
Import the audio file you wish to use from your computer or add music from the Media Library to an audio track. If you are using a superior-quality version of the audio that you detached, drag it to an audio track beneath the separated audio and ensure that the waveforms align. Then, select the detached audio clip and delete it.
Trim Audio Clips
To remove a segment from an audio clip, drag the play head to the start and end points of the undesired section and press the scissors icon to split the clip. Then select the unwanted section and press the delete icon to remove it.
Fade Audio in or out
After adding your audio to the timeline, left-click on the music in the timeline, and locate "Fade in/out" in the Properties Panel.
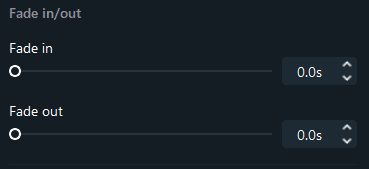
Set fade-in and fade-out effects by dragging the sliders or by specifying how many seconds a fade effect should last.
The further you drag, the longer the fade effect will last.
Adjust Audio Speed
The method of adjusting the speed of your audio is the same as that for adjusting video speed:
Left-click on the audio file and select "Speed" in the Properties Panel.
Noise Reduction
To eliminate unwanted background noise from your recorded audio and video clips, follow the steps below:
Left-click on an audio clip in the timeline panel and locate "Noise reduction" under the Audio option.
Check the "Noise reduction" box.
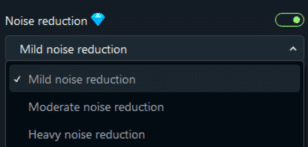
Choose the level (Mild, Moderate, or Heavy) of noise reduction that you require.
Note: You can remove wind noise, computer hums, and other consistent sounds using the Noise reduction tool.
Editing Text
Add image to Video Track
To incorporate an image into a video track, select the image from your media library, and drag and drop it onto the timeline.
Note: To insert an image in the middle of a video clip, you'll need to split the clip at the desired point for the image placement. The image can then be inserted between the two separate segments of the clip.
Chane Image Duration
To move an image, drag it within the Preview window. For resizing, drag the small circles along its edges.
Rotate or Flip an Image
To rotate or flip an image, click on it within the timeline. In the Properties Panel under the Video option, rotate the slider clockwise or counter-clockwise in the Rotate section. You can also input a specific value for adjustment.
Use the Flip Horizontal or Flip Vertical icons in the Flip section to reverse the image direction.
Adjust Image Color
Click on the image and find the Color Tab in the Properties Panel. You can adjust various aspects like temperature, tint, contrast, saturation, and brightness from the Color section.
Editing Text
Add Text Effect
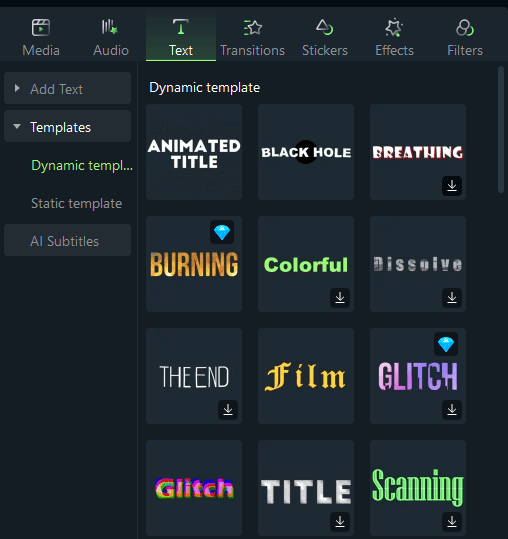
Add a title to your video using customizable Title effects. Preview the Texts to see how they appear before adding them to your video.
To add text, drag it from the Texts library onto the timeline panel. You can also click the + icon of the desired text effect.
Edit Text Effects
The default duration for a text effect is 3 seconds. You can adjust this by dragging its edges on the timeline. Click on the text effect in the timeline to open the Text editing panel where you can modify style (font, size, color, etc) and animation.
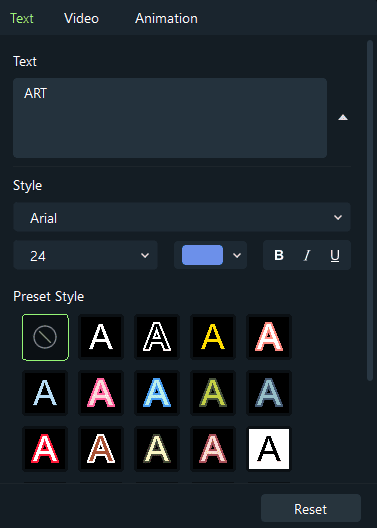
You can rotate text by adjusting the Rotate slider in the Properties Panel.
Resize a text box by dragging the circles around it or change the Scale settings.
To reposition a text box, drag it within the Preview window or input X and Y axis values in the Position section.
Remove a Text
Select the text in the timeline and press the Delete key, use the delete icon in the toolbar, or right-click and choose Delete.
AI Subtitles
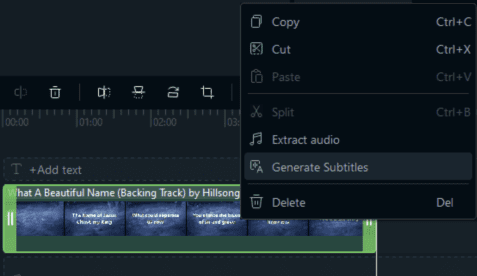
Our Video Editor also features AI Subtitles. This function automatically generates subtitles for your video clips, eliminating manual transcription. It allows users to manually adjust and refine any generated text for perfect alignment with their vision.
To generate AI Subtitles, right-click video or audio clips in the timeline and select Generate Subtitles.
Adding Effect
Filter and Effects
The Video Editor allows you to add as many filters and effects as you like to your video. There are ways to do this:
In the Media Library, click Filters, and then download the filters that you want to add to your project.
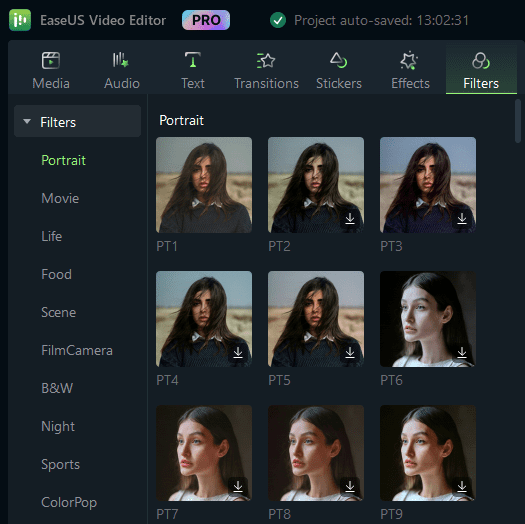
1. Hover your mouse over the thumbnail of the filter you want to use. When you see a plus icon, click it. Then filter will be added to the timeline.
2. Drag the filter and drop it directly onto the timeline.
The same process applies for adding effects.
Remove Filters and Effects
To remove filters or effects, you can either select them in the timeline and press Delete on your keyboard, or right-click on them and select Delete from the drop-down menu.
Find Filters and Effects
Filters and effects are sorted into themed categories (e.g., Portrait or Movie) for easy access.
Customize Filters
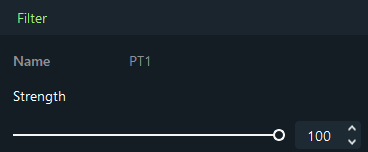
You can adjust the duration or strength of the filters. The default duration is 3 seconds, but you can modify it by dragging the edge of the filter in your timeline.

The strength of the filter, ranging from 0-100, can be adjusted by clicking on the filter in the timeline and customizing it in the Properties Panel.
Stickers and Transitions
Stickers are entertaining graphics that can enhance your videos
Transitions can be added between your video clips to create a smoother flow or to add a creative flair to your video.
To add a Sticker to your project:
Go to Stickers and select the sticker you want to add to your project.
Drag the sticker into the timeline.
To remove a sticker from your project:
There are two ways to remove a sticker from your video.
1. Select the sticker that you want to remove and hit Delete on your keyboard.
2. Right-click on the sticker in the timeline and select Delete from the menu
How to Apply, and Remove Transitions:
To add a transition between videos or images in your project:
Go to Transitions, find a transition you like, and drag it into the timeline between your two clips.
To change the duration of a transition, left-click on it in the timeline and then enter a new duration in the Properties Panel. You can also click and drag the start or end point of the transition forwards or backward within the video clip or image. The default duration is 3 seconds.
The transition between clips:

To remove a transition from your project:
Select the transition that you want to remove in the timeline and hit Delete on your keyboard, or you can right-click on the transition in the timeline and select Delete from the menu.
Export Project
Export as a Video File
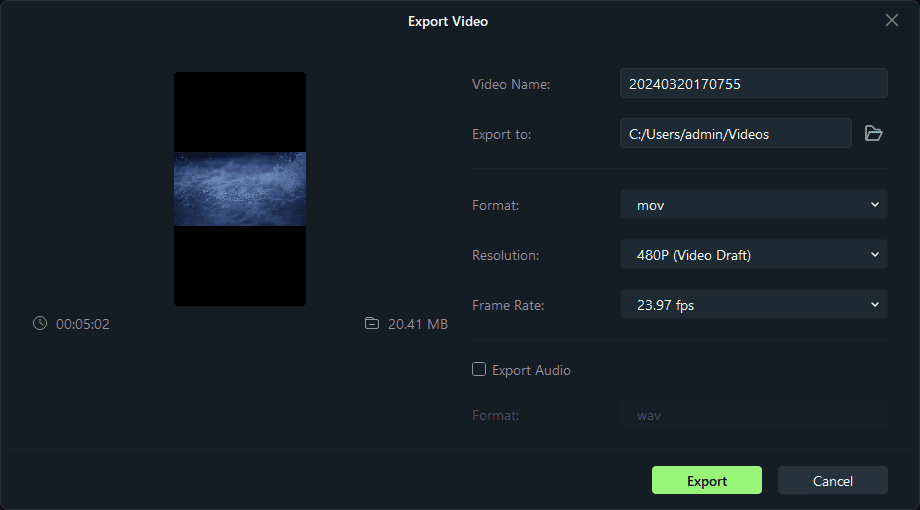
Once the editing is done, you can export the project file into MP4 or MOV.
You can rename the file, choose the output folder, and configure the parameters of the file, for example, file name, resolution, frame rate, etc. When all is well set, click "Export" in the lower right corner to save the file on your computer.
Export with an Audio File
To export audio as an independent file, please check the box next to Export Audio and select audio format as WAV or MP3.

Feedback and Support
We value your precious feedback. For any feedback or if you need support, Click "Support" to contact our Livechat support, and click "Feedback" to report your experience.