How to Speed up Video in DaVinci Resolve in 3 Ways 2025
Dawn Tang updated on Mar 25, 2025 to AI Article
Dawn Tang updated on Mar 25, 2025 to AI Article
How to speed up video in DaVinci Resolve? You can use the Change Clip Speed option and change the speed percentage to speed up your videos. For more details, read on.
▶️In DaVinci Resolve, right-click the clip in the timeline, select "Change Clip Speed," adjust the speed percentage, click "Change," and play the video to review.
How can you maintain viewer interest by keeping the pace of your video brisk and dynamic? This is a common question among content creators. Typically, they speed up a video on their iPhones or PCs to highlight important parts or to show the progression of events that occur over a long period in a short amount of time.
DaVinci Resolve is a versatile audio and video editing software for multiple systems, supporting color correction, video editing, plugins, and effects. With this video editor, you can edit images, adjust video speed, add text overlays, track motion, and more. But how do you change the speed of a clip in DaVinci Resolve? This article details four ways to do so. Read on to learn more.
The first method is the easiest one, which changes the playback speed of the selected clip. Increasing the speed reduces the clip duration, while decreasing it extends the clip duration.
| ⭕Pros | ❌Cons |
|---|---|
|
|
DaVinci Resolve change clip speed and duration:
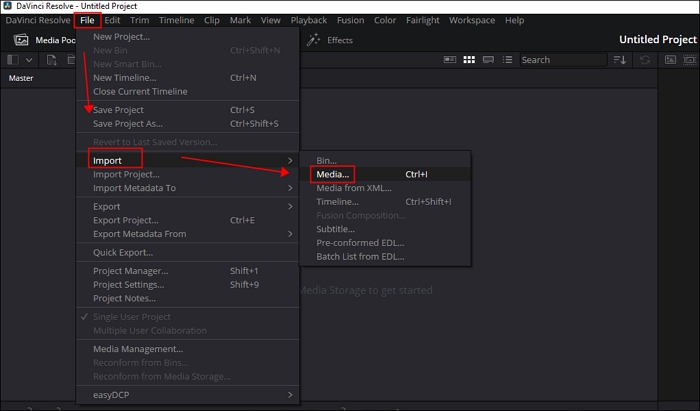
Step 1. Open DaVinci Resolve, click "Untitled Project," go up to the "File" menu and import your media. Bring the video to the timeline.
Step 2. Right-click on the clip and select "Change Clip Speed" from the context menu. Or select the clip and press R.
Step 3. Input the desired speed percentage or hover on the value and scroll left and right to adjust the speed. Press "Change" and play the video to check out.
How to Speed up Playback in Davinci Resolve 18 [5 Tips]
Changing the speed of playback in DaVinci can be necessary in some situations. To let you feel comfortable in such conditions, we have discussed the methods to do so. You can learn how to speed up playback speed in DaVinci Resolve using different approaches.
Compared to the Change Speed option, Retime Controls allow for more flexible speed adjustments, including variable speed within the same clip.
| ⭕Pros | ❌Cons |
|---|---|
|
|
Step 1. Right-click on the clip and select "Retime Controls" (Ctrl+R)
Step 2. Extend the dropdown of the percentage below the clip, select "Change Speed," and choose the degree.
Step 3. For specific parts of the video: when you see an arrow on the footage, move the playhead to the place where you want to speed it up. Drag the arrow to left or right to speed it up or slow it down.
Then click on the arrow to "Add Speed Point." The position of a speed point cannot be changed once added.
You can see two sliders; the upper slider adjusts the speed and the lower one decides the speed range. Move the upper slider or the arrow to increase the speed of the selected clip.
You can also open the dropdown menu at the bottom to change the speed percentage.
See also:
The Retime Curve provides a graphical representation of the speed changes, allowing for precise adjustments.
| ⭕Pros | ❌Cons |
|---|---|
|
|
Step 1. Right-click on the video clip and select "Retime Curve."
Step 2. Position the palyhead to where you want to add the speed ramp and press M to add a blue marker. Expand the downward menu and add a desired speed point. Drag the speed points to add a fade-in/fade-out effect.
Click "Retime Frame" downward to select "Retime Speed" to synchronize the speed with the speed next to the clip.
Share this article with your friends on social media to help them master their video editing skills!
If you just want to speed up MP3s or videos quickly, you can use an online speed changer. EaseUS Online Speed Changer adjusts your videos from 0.1x to 1.5x without losing the audio quality and allows you to change the pitch and volume of the video simultaneously.
The MP3 volume booster accepts various formats, including MP3, WAV, M4A, FLAC, and MP4, and exports them as MP3/MP4 files. The process is swift, thanks to an advanced AI model. This versatile audio editing tool can remove vocals from songs, extract instruments and noise from local audio and video files, and accurately identify the key of a song.
Key Features
Step 1. Enter the main interface of EaseUS Online Speed Changer. The left sidebar shows new functions of this online tool. Find "Pitch changer" and click it.
Step 2. Then, drop the audio/video file in the blank. It supports multiple file formats, including MP3, MP4, WAV, M4A, and FLAC.
Step 3. The website will analyze your file with AI. You can drag the little dot in the "Speed" section to slow down or speed up with a range of 0.5X to 1.5X.
Step 4. Click "Save and Export" to download the processed file to your local file location.
You can speed up videos in DaVinci Resolve using the Change Clip Speed, Retime Controls, and Retime Curve, each equipped with various tools for precise and flexible speed adjustments. For quick and easy online video speed changes, you can also use EaseUS Online Speed Changer.
Fast playback speed in DaVinci Resolve can be caused by running NLE-type software, mismatched project settings between the timeline and playback, enabling the desktop video driver for a Decklink device without having a Decklink installed, or due to certain plugins.
To fix this issue:
If the clip speed option is grayed out, it might be because the track is locked, preventing edits. To fix this, try changing the values with your mouse. Alternatively, when the Change Clip Speed pop-up box is open, toggling the Freeze Frame option on and then off again can activate the speed percentage box. Another solution is to check the Ripple Timeline box.
Split the video clip in a video editor, then select the section and speed it up using the playback speed slider or speed percentage.
Related Articles
How to Get Vocal Samples | 2025
How to Adjust Volume in Premiere Pro [ 2025 4 Ways]🔊
16 AI Vocal Remover for PC to Isolate Acapella Painlessly
10 Simple Volume Booster Chrome Extensions 2025🔊